Friday, December 29, 2017

Korean Beef and Cabbage

I'm always on the lookout for a quick meal, and those quick meals usually feature ground hamburger. It cooks up quickly and it is a pretty versatile ingredient. This meal has been a huge hit in our house over the last couple of months. I've slightly modified a couple Korean Beef recipes I've found out there, added cabbage, and served it over Trader Joe's brown rice (which cooks up in 3 minutes in the microwave) or over coconut rice that I cook in the oven. Either one is a hit, and there are never any leftovers of this dish. If you don't like cabbage, just leave it out. Either way, this one's a winner.

Korean Beef and Cabbage
Ingredients:
1 pound ground beef
1/2 head of green cabbage, sliced
3 garlic cloves, minced
1/4 cup packed brown sugar
1/4 cup reduced-sodium soy sauce
2 teaspoons sesame oil
1/4 teaspoon ground ginger
1/4 - 1/2 teaspoon crushed red pepper flakes
1 teaspoon pepper
2 cups hot cooked rice
sliced green onions and sesame seeds for garnish

1. In a large skillet cook the ground beef and garlic breaking it into crumbles over medium heat until no longer pink.

2. When the beef is cooked, add the cabbage and cook down for 2-3 minutes.

3. In a small bowl whisk brown sugar, soy sauce, sesame oil, ginger, red pepper flakes and pepper. Pour over the ground beef mixture and let simmer for another a couple of minutes.

4. Serve over hot rice and garnish with green onions and sesame seeds.

Seriously, that's it. So fast and so delicious.

Monday, September 5, 2016

Ham and Gruyere Hash Brown Waffles

I'm always looking for a new twist on breakfast. I ran across this recipe while looking at the September/October 2016 issue of Eating Well, and thought these sounded easy and amazing. I whipped them up this morning for breakfast in less than 20 minutes, and they were delicious! I used an herbed butter to top these waffles, but they probably didn't even need that. They were a little salty, a little smoky, and a lot delicious. They are also entirely gluten free, which is a bonus if you've got someone in your house who can't eat gluten (do pay attention to the shredded potatoes you're using if they are pre-packaged to ensure they don't have any gluten added). My mind is racing with all sorts of fun variations you can do with this basic recipe. This one has gone into the permanent files.

Ham and Gruyere Hash Brown Waffles
Ingredients:
3 large eggs
2 tablespoons extra-virgin olive oil
3 cloves garlic, finely chopped
1 tablespoon minced fresh chives or 1 teaspoon dried
1/4 teaspoon ground pepper
20 ounces frozen shredded hash browns (about 7 cups), thawed or a 20-ounce bag of fresh shredded potatoes
1 cup diced ham
1 cup shredded Gruyère cheese

1. Preheat a classic waffle iron to medium-high.

2. Whisk eggs, oil, garlic, chives and pepper in a large bowl.

3. Place hash browns in the center of a clean kitchen towel. Gather up the edges of the towel and twist and squeeze to wring out excess moisture from the hash browns. Stir the hash browns, ham and cheese into the egg mixture. *NOTE: If you using the fresh shredded potatoes, you can skip the squeezing step.*

4. Coat the waffle iron with cooking spray. Use a generous 1 cup of the mixture per waffle and cook until browned and crispy, about 5 minutes each.

Sunday, January 31, 2016

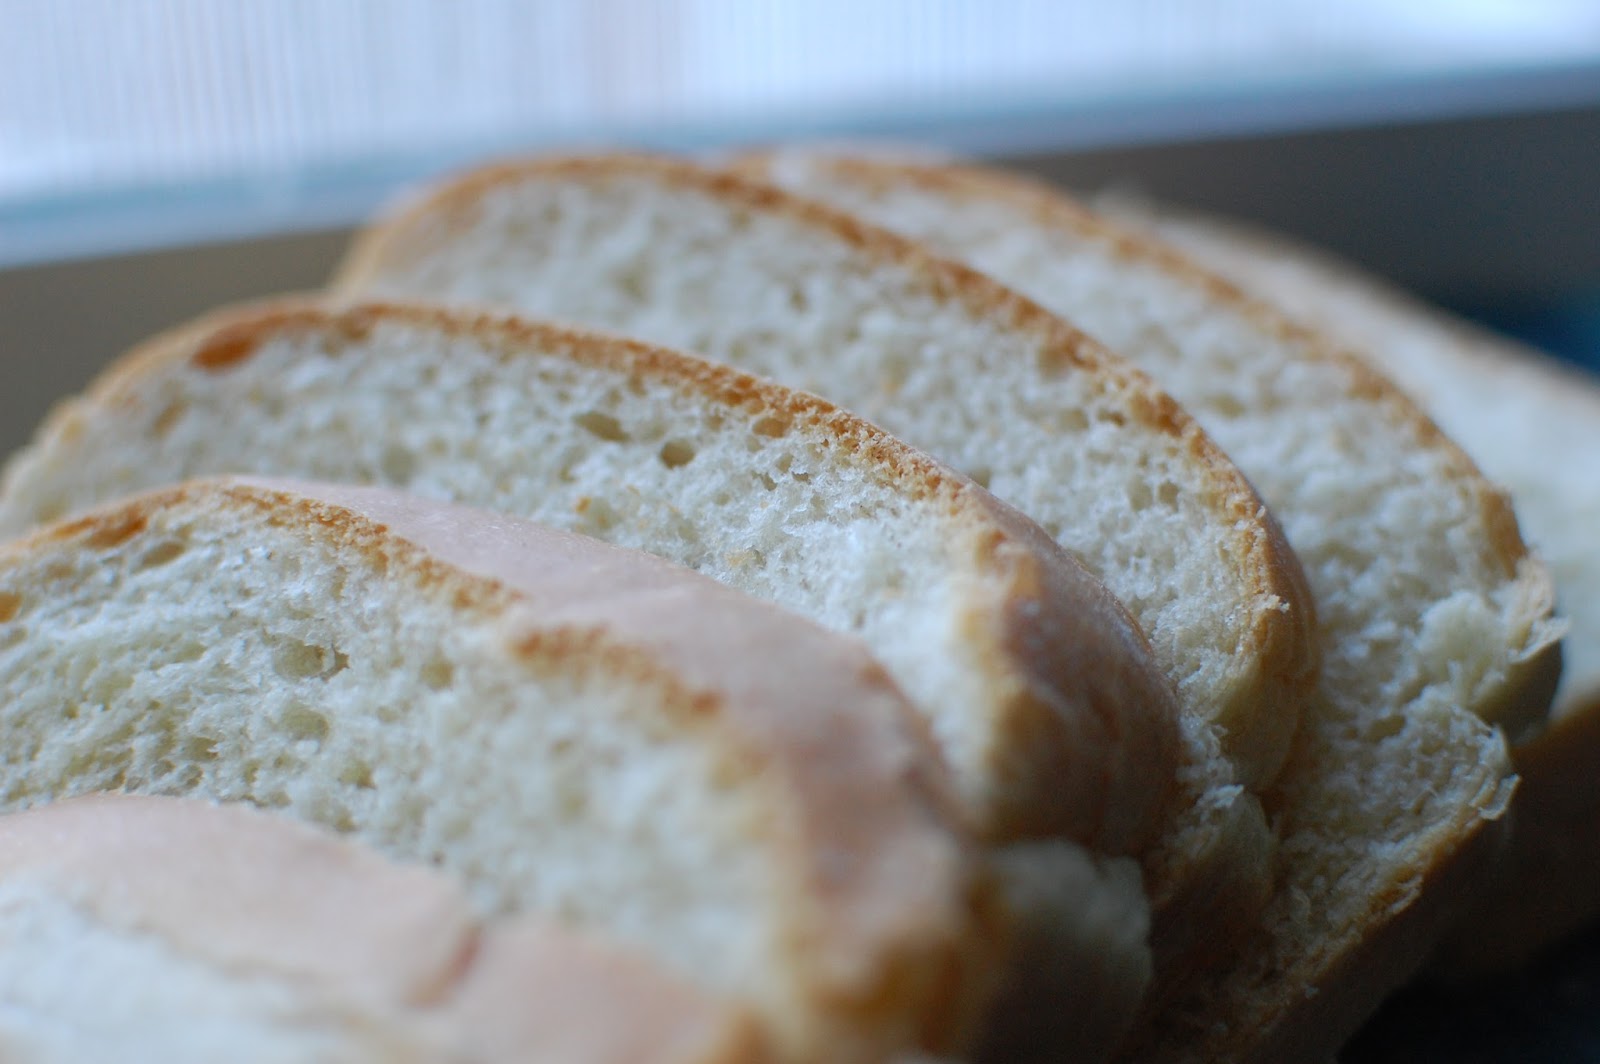
Sandwich bread with no added sweetener

I make a lot of bread. I love the whole process from the smell of yeasty goodness, to the kneading of the dough, to slow gentle rising of the dough, to the final golden brown product that makes the whole house smell like a boulangerie in Paris. But have you tried finding a recipe for sandwich bread (or bread in general) that doesn't have sugar in it? Particularly a white bread? Good luck! Why is that? Why does the bread need the sugar? Many think the yeast needs the sugar to feed on. Wrong. Bread without sugar rises in just the same way. Many think the flavor with sugar is better. Wrong. You can eat this bread (below) and you'd never know the sugar is missing. There is absolutely no reason to add sugar to everyday sandwich bread. So, here's my recipe for sandwich bread with no added sweeteners. Try it! You'll love it. I also used this same recipe and swapped out half the AP flour with whole wheat pastry flour. The bread was just as good.

Sandwich bread with no added sweetener
Ingredients:
3 cups unbleached All-Purpose Flour
1/2 cup milk (mix milk and water together and heat to approx. 110 degrees)
1/2 cup water
1/4 cup melted butter
1 1/4 teaspoons salt
1 packet instant yeast

1. In a large bowl, combine all of the ingredients and stir until the dough starts to leave the sides of the bowl. Transfer the dough to a lightly floured surface, flour your hands, and knead it for 6 to 8 minutes, or until it begins to become smooth and supple. Or mix and knead the dough using an electric mixer or food processor. I use the dough hook on my KitchenAid for roughly 4-5 minutes.

2. Transfer the dough to a lightly greased bowl, cover the bowl, and allow the dough to rise until puffy though not necessarily doubled in bulk, about 1 to 2 hours, depending on the warmth of your kitchen.

3. Gently deflate the dough and transfer it to a lightly floured surface. Shape the dough into an 8" log. (I love the instructions on The Kitchn site for how to shape a bread loaf into a log to get into your pan.)

4. Place the log in a lightly greased 8 1/2" x 4 1/2" loaf pan, cover the pan loosely with lightly greased plastic wrap, and allow the bread to rise for about 60 minutes, until it's domed about 1" above the edge of the pan.

5. Preheat your oven to 350°F. Bake the bread for 30 to 35 minutes, until it's light golden brown.

Sunday, January 24, 2016

English muffins with no sugar

I've been eliminating sugar from my diet since the beginning of the year. This has been more of a challenge than I originally thought, not because I'm dying for sugar (although, there are days that are tougher than others), but because pretty much every product on the market (and I'm talking savory products) has sugar in it. Crackers? Yep. Soup? Yep. Bread? For sure. I thought I might be safe with English muffins, but, no, they all have some form of sugar in it. So, I took matters into my own hands (after watching a Great British Baking Show where they made English muffins), and decided to whip up my own muffins sans sugar, honey or any other sweetener. Now, I will warn you now ... this is not a traditional English muffin recipe where you knead the dough, let it rise, roll it out and cut the muffins before griddling them. You can certainly find a recipe (and I probably will at some point try that version) like that. But this recipe is more of a free-form English muffin. I do use a griddle (traditional), but this recipe also requires a bake in the oven (not traditional). It's a modified version of the New York Times recipe, and as long as you don't mind working with a wet dough and getting your hands a bit doughy, this recipe is easy, knead-free, and delicious. Just don't say you haven't been warned. Please don't despair when you have yeasty, wet dough dripping off your fingers. Wait until you taste these babies.

English muffins with no sugar
Ingredients:
1 packet active dry yeast
4 tablespoons unsalted butter
1/2 cup plain yogurt
1/3 cup warm water (about 110 degrees F)
1/2 cup warm whole milk
1 teaspoon fine sea salt
1 cup whole-wheat flour
1 cup all-purpose flour
1/2 teaspoon
Cornmeal, preferably coarse, as needed

1. In a small bowl combine yeast and 1/3 cup warm water and let rest until yeast has dissolved, about 5 minutes.

2. Melt 2 tablespoons butter and put it in a large bowl. Whisk in yogurt, milk, salt and the yeast mixture.

3. Add flours and baking soda to bowl and beat thoroughly with a spoon or rubber spatula until well combined. Cover bowl and let rest in a warm spot for 1 to 1 & 1/2 hours, or until dough has doubled.

4. Heat oven 350 degrees. Lightly dust a small baking sheet with cornmeal.

5. Place a large skillet over medium heat and melt 1 tablespoon butter or use an electric griddle at 350 degrees (that's what I use). Using a large ice cream scoop or 1/2 cup measuring cup, drop batter into skillet to form round muffins about 4 inches in diameter, mounding the batter in the center. (You may need to coax the dough a little with your fingers, so be careful of the hot pan, and don’t worry if they’re not perfectly circular.) If using a skillet, reduce heat to low and cook 3 to 5 minutes, until bottoms are golden brown. (Be careful not to let them burn.) If using a griddle, keep heat at 350 degrees, but watch the muffins carefully.

6. Flip muffins using a spatula. Cook 2 to 4 minutes or until the other sides are golden brown. Place muffins on prepared baking sheet. Repeat using remaining batter and another tablespoon of butter.

7. Bake muffins in oven for 10-12 minutes, or until puffed and cooked through. Split the muffins with a fork and toast before eating.

Friday, January 22, 2016

Grown up Ramen

My boys adore top ramen. I like the idea, but those packages with the overly salty seasoning packet just makes me cringe. So, I set out to make my own grown up version of ramen. I wanted chicken, egg, spinach and a really flavorful broth. This recipe fit the bill quite well. And, it's amazingly easy to modify based on what's in your fridge and pantry.

Grown up Ramen
Ingredients:
1 tablespoon sesame oil
4 cloves garlic, minced
1 tablespoon freshly grated ginger
4 cups chicken broth
3 cups water
1 tablespoon soy sauce, or more, to taste
1 tsp. fish sauce
3 pkgs ramen noodles (discard seasoning packets)
3 cups baby spinach
1 carrot, grated
2 tablespoons scallions (the green parts)
1 cup chopped, roasted chicken
2-3 soft-boiled eggs, sliced lengthwise

1. Heat 1 tablespoon sesame oil in a large stockpot or Dutch oven over medium heat. Add garlic and ginger, and cook, stirring frequently, until fragrant, about 1-2 minutes.

2. Whisk in chicken broth, soy sauce, fish sauce and 3 cups water.

3. Bring to a boil; reduce heat and simmer about 10 minutes. Stir in noodles until loosened and cooked through, about 2-3 minutes.

4. Stir in spinach, carrot and scallions until the spinach begins to wilt, about 2 minutes. Top with chicken and eggs.

5. Serve immediately.

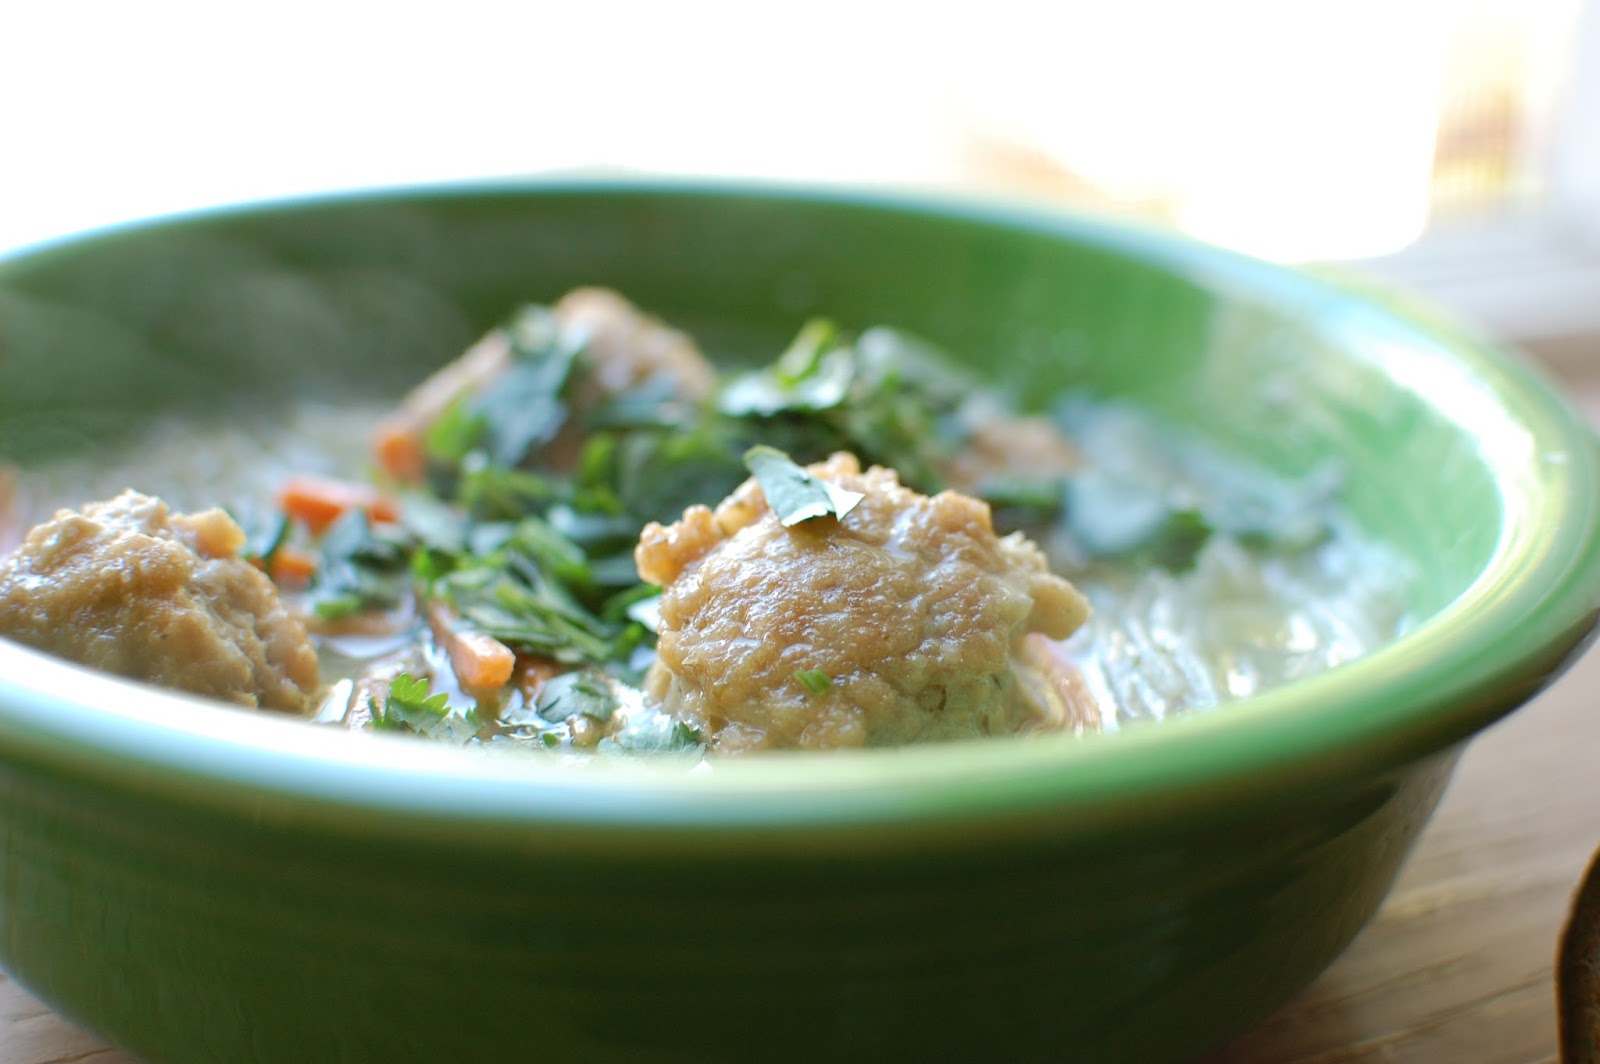
Chicken Coconut Meatballs

I saw a variation of these meatballs in a cookbook I've been using to eliminate sugar from my diet. The original recipe had curry powder in these, which, if you like curry powder, would be lovely. I do not, so I opted to leave the curry powder out. But these were just delicious, hearty and very filling. I served them over brown rice with some roasted broccoli on the side. Yum.

Chicken Coconut Meatballs

Ingredients:
1.5 lbs. boneless, skinless chicken (I used thighs, but a combo of breasts and thighs would be great)
1 carrot, grated
2 cloves garlic
1/2 cup unsweetened shredded coconut
1 egg
1/2 tsp salt
handful of cilantro leaves
coconut oil

1. Put everything, except the oil, into a food processor and blend until smooth.

2. Using your hands, form 24 small balls (or 12 larger ones).

3. Heat several tablespoons of oil in a large frying pan over medium-high heat. When it is hot enough that a meatball sizzles as soon as it hits the pan, put the meatballs in. Cook in batches.

4. Cook for 2 minutes, then roll the meatballs over and cook for 5 more minutes. (Cook time will be longer if you do larger meatballs.) Put a lid on the pan and cook for another 6-8 minutes. Serve immediately.

Sunday, January 3, 2016

Whole Wheat Artisan Bread No Sugar

I have been looking for a recipe for whole wheat bread that has no sugar, honey or any other sweetener in it. This is more challenging than you would think. I also wanted something that would be relatively easy to make and didn't require a super long proofing time. I scored big time when I found this recipe on Heartful Habits for a simple whole wheat artisan bread that is made simply with water, AP flour, whole wheat flour, yeast and salt. That's it. It's SUPER easy to make, and it is SO delicious! In fact, I think I like it better than any other bread I've made - not kidding. It's so good. I think I'll be making this on a regular basis.

Whole Wheat Artisan Bread - No Sugar

Ingredients:
1.5 c warm water (about 110 degrees - and yes, I test mine with a thermometer)
1/2 tbsp + 3/4 tsp dry, active yeast (or instant yeast works here as well)
3/4 tsp salt
1.75 c whole wheat flour
1.5 c all purpose flour

1. Place all ingredients into a large lidded bowl or container.

2. Mix with a wooden spoon to combine.

3. Place lid on somewhat loosely to allow gases from the yeast to escape. Place somewhere warm to rise for 2 hours.

4. Shape the dough, and place on lightly floured parchment paper. Cover and allow to rest for 40 minutes.

5. Preheat oven to 450°F. Place baking sheet (I used a baking stone) in oven at this time as well to warm up. Also put in an oven safe dish of water to create steam.

6. With a serrated knife make a few slashes across the loaf. Place the loaf on the parchment paper onto your hot baking sheet/pan/stone and into the oven.

7. Bake for 30-40 minutes. The bread is done when the crust is golden, and it sounds hollow when you tap it with your knuckle.

Bacon and Egg "Cupcakes"

I'm always looking for a quick, protein-filled breakfast that is nutritious and satisfying. If I can grab and go, even better! So when I saw these in I Quit Sugar, a new book I got over Christmas, I knew we had to try them out. We did four of these as scrambled eggs, since that's what Andy likes, and the rest we did as eggs just cracked right into the muffin tin. The recipe calls for them to be cooked for 15 minutes. This is a little long as all my yolks were hard cooked. I want a runny yolk, so I'll be experimenting with lower cooking time. Either way, these were delicious, and I will definitely be cooking them again.

Bacon and Egg Cupcakes

Ingredients:
12 eggs
10-12 slices bacon (you may need to cut these to fit the muffin tin)
Feta Cheese
Herbs

1. Preheat oven to 400 degrees.

2. Lightly grease a muffin tine. Line each cu with a slice of bacon, pressing the bacon around the sides of the hole, not on the bottom. If you like crispier bacon, cook for 5-8 minutes. Remove from the oven.

3. Crack one egg into each hole.

4. Sprinkle with cheese and fresh herbs.

5.Bake for 10-15 minutes or until the egg is the doneness you like. Leave in the pan for 1 minute, and then using knife, remove. Enjoy immediately.

Sunday, November 29, 2015

Baked Cranberry Oatmeal

A couple of weeks ago, I made a Baked Blueberry Oatmeal with Pecan Streusel Topping that I just fell in love with; on the same site where I found that recipe (Three Many Cooks), I found this recipe for a Baked Cranberry Oatmeal. And of course, I had leftover cranberries after Thanksgiving, so I made this tonight for breakfast tomorrow. I might have snuck a little taste tonight to make sure it tasted okay. :) And yes, yes it does. It's quite delicious. A little more tart than the blueberry version but equally delicious. I made a few tweaks on the milk in this recipe (the original uses almond milk), and the flour (the original uses All-Purpose flour), but the rest is the same. Yum.

Baked Cranberry Oatmeal
Ingredients:
3 cups old-fashioned oatmeal
1.5 cups brown sugar, divided
1.5 teaspoons baking powder
1/4 teaspoon salt
1 tablespoon finely grated orange zest (zest of about 1 orange)
2 teaspoons cinnamon, divided
2 cups 1% milk
1 cup heavy cream
1 tablespoon vanilla extract
2 large eggs
2 cups fresh cranberries, divided
3/4 cup whole wheat flour
6 tablespoons butter, melted but not hot
1/2 cup coarsely chopped walnuts

1. Heat oven to 375 degrees. Mix oatmeal, 1 cup brown sugar, baking powder, salt, orange zest and 1.5 teaspoons cinnamon in a medium bowl. In a separate bowl whisk milk, vanilla, and eggs. Stir milk mixture, then 1 cup of cranberries into oatmeal mixture; turn into a 13- by 9-inch pan; Bake until oatmeal is just starting to set, about 20 minutes.

2. Meanwhile, mix flour, butter, walnuts, and remaining brown sugar and cinnamon in a small bowl. Crumble mixture over just set oatmeal, scatter remaining cranberries, and continue to bake until oatmeal is just set and crumble is golden brown, about 20 minutes longer. Serve warm.

Peanut Butter Squares

We had Steaksgiving with some friends last night (best idea ever!), and the moment I saw this recipe on Kevin and Amanda, I knew that I wanted to try it and bring for the whole group to enjoy. This recipe is SOOOO easy, and soooo dangerous. I warn you not to make this when it will sit around in your house. These are addicting! Amanda (of the Kevin and Amanda blog) made this in pie form, but I made it in a brownie dish (per her suggestion when sharing with people) lined in aluminum foil, and easily removed it from the pan, and cut into squares. They are quite rich, so cut small!

Peanut Butter Squares (via Kevin and Amanda)
Ingredients:
1 (14.3 oz) package whole Oreos (about 36 Oreos)
1 cup (16 tablespoons) butter, divided
1.5 cups + 2 tablespoons creamy peanut butter, divided
1 cup powdered sugar
1 cup chocolate chips
1/2 cup heavy whipping cream

1. Finely crush the Oreos with a food processor, blender, or in a Ziploc bag. Stir crumbs together with 8 tablespoons melted butter until well combined. Press into the bottom and sides of a pie pan. Freeze crust for 10 minutes until set.

2. Add the remaining 8 tablespoons of softened butter, 1½ cups creamy peanut butter, and 1 cup powdered sugar to a large mixing bowl or the bowl of a stand mixer. Beat on low speed until smooth and creamy. Spoon the peanut butter mixture over the crust into a smooth layer. Place back in freezer.

3. Place chocolate chips and remaining 2 tablespoons of peanut butter in a large glass or heat-proof bowl. In a saucepan, bring heavy whipping cream to a rolling simmer over medium-high heat. Pour the cream over the chocolate chips and peanut butter and let sit for 5 minutes, then whisk until completely smooth. Pour the chocolate layer over the peanut butter layer. Refrigerate, covered, at least 1 hours until ready to serve.

Wednesday, November 18, 2015

Southern Tortellini Soup

I was in Atlanta recently for a conference, and one night, I ordered a bowl of Southern Minestrone soup. It was delightful: a broth-based soup with navy beans, carrots, celery, onion, potatoes, collard greens, and garlic. I came away determined to make my own version at home. Unfortunately, I was completely out of beans (which almost NEVER happens in this house), and I didn't want to go to the store for one item, so instead, I made a Southern Tortellini Soup. Y'all, this is just plain delicious. I may never make the minestrone version because this soup is so darn addicting. And like most of my soups, it's totally versatile. I had used up my collard greens, but I had two different types of flat kale, so I cut that up and used in this soup. So good. Go ahead, make a pot today. My one warning is this: all pasta loves liquid, so if you don't eat this all, be warned that when you wrap it up and put in your fridge, you will not have any liquid left the next day, so be prepared to add more chicken broth and a little more lemon or lime juice.

Southern Tortellini Soup
Ingredients:
1-2 tbs. extra virgin olive oil
1 onion, chopped
3 carrots, diced
3 stalks celery, diced
Herbs de Provence
Two bunches collard greens, kale or chard, stems removed and greens chopped
8 cups chicken stock
2 cups water
3/4 cup white wine (I used Madeira)
12 oz. dried tortellini pasta
Red pepper flakes
Salt and pepper
2 tsp. freshly squeezed lemon or lime juice

1. In a heavy bottomed pot over medium-high heat, add the olive oil until it shimmers. Add the onions, carrots and celery. Saute until onions are translucent, but not brown. Add the herbs and red pepper flakes and stir for another 2 minutes.

2. Add the wine and turn the heat up to high. Cook wine down until it has reduced by half. Add the stock, water and greens. Bring to a boil; add the pasta. Bring back to a boil; turn heat down to medium-high. Cook for 15-18 minutes. Taste and season with salt and pepper.

3. Remove from heat and add lemon or lime juice. *Don't skip this step - this is one of the best things you can do to a broth-based soup...it heightens all those flavors!

4. Enjoy!

Tuesday, November 17, 2015

Whole Wheat Waffles with Protein Powder

I'm always looking for filling, hearty but delicious breakfast options for my family. My boys, like most, love waffles. I've made a gazillion different versions of waffles, but I landed on one that is truly tasty, really satisfying and very tasty. I make a double batch of these, individually freeze them on sheet pans, then fill up Ziploc baggies with these waffles and store them in the freezer. My kids (or Andy and I, for that matter) just pop one out of the freezer in the morning, hit toast frozen on our toaster oven and in less than five minutes, they have a filling, yummy breakfast. I started with the 100 Days of Real Food recipe and then modified it over the months until I found just the right mix of ingredients. As the title indicates, I add protein powder to these waffles to ensure my boys are getting enough protein to start their day right. Below is a double batch of waffles, which usually makes 12-14 waffles for me.

These can be eaten with pure maple syrup, a little peanut or almond butter, butter and powdered sugar, or jam. Or, if you want to have them savory, they'd be perfect for a chicken and waffle dinner! Try them out...delish!

Whole Wheat Waffles with Protein Powder
Ingredients:
4 large eggs
3 cups milk (I like almond or coconut milk here)
1/2 cup oil (I usually use sunflower oil)
2 tablespoon agave nectar
1 teaspoon ground cinnamon
1/2 teaspoon baking soda
3 cups whole-wheat pastry flour (regular AP flour works here or whole wheat flour works as well)
4 teaspoons baking powder
1/2 teaspoon salt
2 tsp vanilla extract
1/4 cup protein powder (mine is plain, but you can use flavored)

1. Preheat your waffle iron.

2. In a large mixing bowl whisk together the eggs, milk, oil, agave, cinnamon, vanilla and baking soda until well combined.

3. Add in the flour, baking powder, protein powder, and salt and whisk together just until the large lumps disappear.

4. When the waffle iron is hot, dab it with a little butter (or nonstick spray) and then ladle some batter onto the center of the iron.

5. Follow the instructions that came with your waffle maker to know how long it should be cooked (mine takes about 3 – 4 minutes each).

If you freeze, freeze them individually on sheet pans, then put in Ziploc bags and pop in the freezer.

Sunday, November 15, 2015

Lemongrass Chicken Meatballs in Green Curry Broth

I got my Fine Cooking issue for December 2015/January 2016, and they had recipes for five different kinds of meatballs. This one caught my eye immediately. Every flavor in this recipe is one of my favorites, and together, they just sing. I made mung bean threads (very similar to rice noodles) to go with my meatballs, but you could do rice or rice noodles. So delicious. This recipe is a major keeper. Also, I already had ground chicken, so I didn't use the thighs as directed. Also, I doubled this recipe and served six people with one serving left over.

Lemongrass Chicken Meatballs in Green Curry Broth via Fine Cooking
Ingredients:
1-1/2 lb. boneless, skinless chicken thighs, cut into 1-inch pieces
1-1/2 tsp. ground cumin
1-1/2 tsp. ground coriander
Kosher salt
1 Tbs. finely chopped fresh lemongrass
1-1/2 Tbs. peanut or canola oil
2 large shallots, thinly sliced (about 1/2 cup)
1 jalapeño, seeded and thinly sliced
1-1/2 cups lower-salt chicken broth
1/2 cup well-shaken canned coconut milk
1-1/2 cups fresh cilantro sprigs; more for garnish
1/2 cup small fresh basil leaves
1-1/2 Tbs. fresh lime juice
1 Tbs. granulated sugar
2 tsp. fish sauce
1-1/2 cups matchstick-cut or grated carrots
Sriracha, for drizzling (optional)

1. Sprinkle the chicken thighs with the cumin, coriander, and 1-1/2 tsp. salt, and toss well. Transfer to a plate and chill in the freezer for 15 minutes.

2. In a food processor, pulse half of the chicken until minced. Transfer to a bowl and repeat with the remaining chicken. Mix the lemongrass into the chicken. To form the meatballs, set a small bowl of cold water nearby and, occasionally moistening your hands, gently roll 1-1/2-oz. portions of the meat between your palms into balls; you should get 16. *I used an ice cream scooper so my meatballs were all uniform. This also means I didn't have to roll each ball in my hands.

3. Over medium-high heat in a 5- to 6-quart heavy-duty pot, heat the oil until shimmering hot. Add half of the meatballs, reduce the heat to medium, and cook, undisturbed, until browned on the bottom, 1 to 2 minutes. Flip and brown the other side, 1 to 2 minutes more. Transfer to a paper-towel-lined plate, and repeat with the remaining meatballs.

4. Add the shallots, jalapeño, and 1/2 tsp. salt to the pot; cook, stirring, until the shallots soften, about 4 minutes. Add the chicken broth and coconut milk and bring to a boil. Stir in half of the cilantro and the basil, and remove from the heat. Using an immersion blender or working in batches with a regular blender, purée the mixture. Return to the pot if using a regular blender. Add the meatballs, lime juice, sugar, and fish sauce. Bring to a simmer, cover, and cook until the meatballs cook through (165°F), 15 to 20 minutes, adding the carrots during the last minute or two to cook until crisp-tender.

5. Divide the meatballs, carrots, and broth among bowls. Top with the remaining cilantro. Drizzle with Sriracha, if using, and serve.

Sunday, November 1, 2015

Apple pie

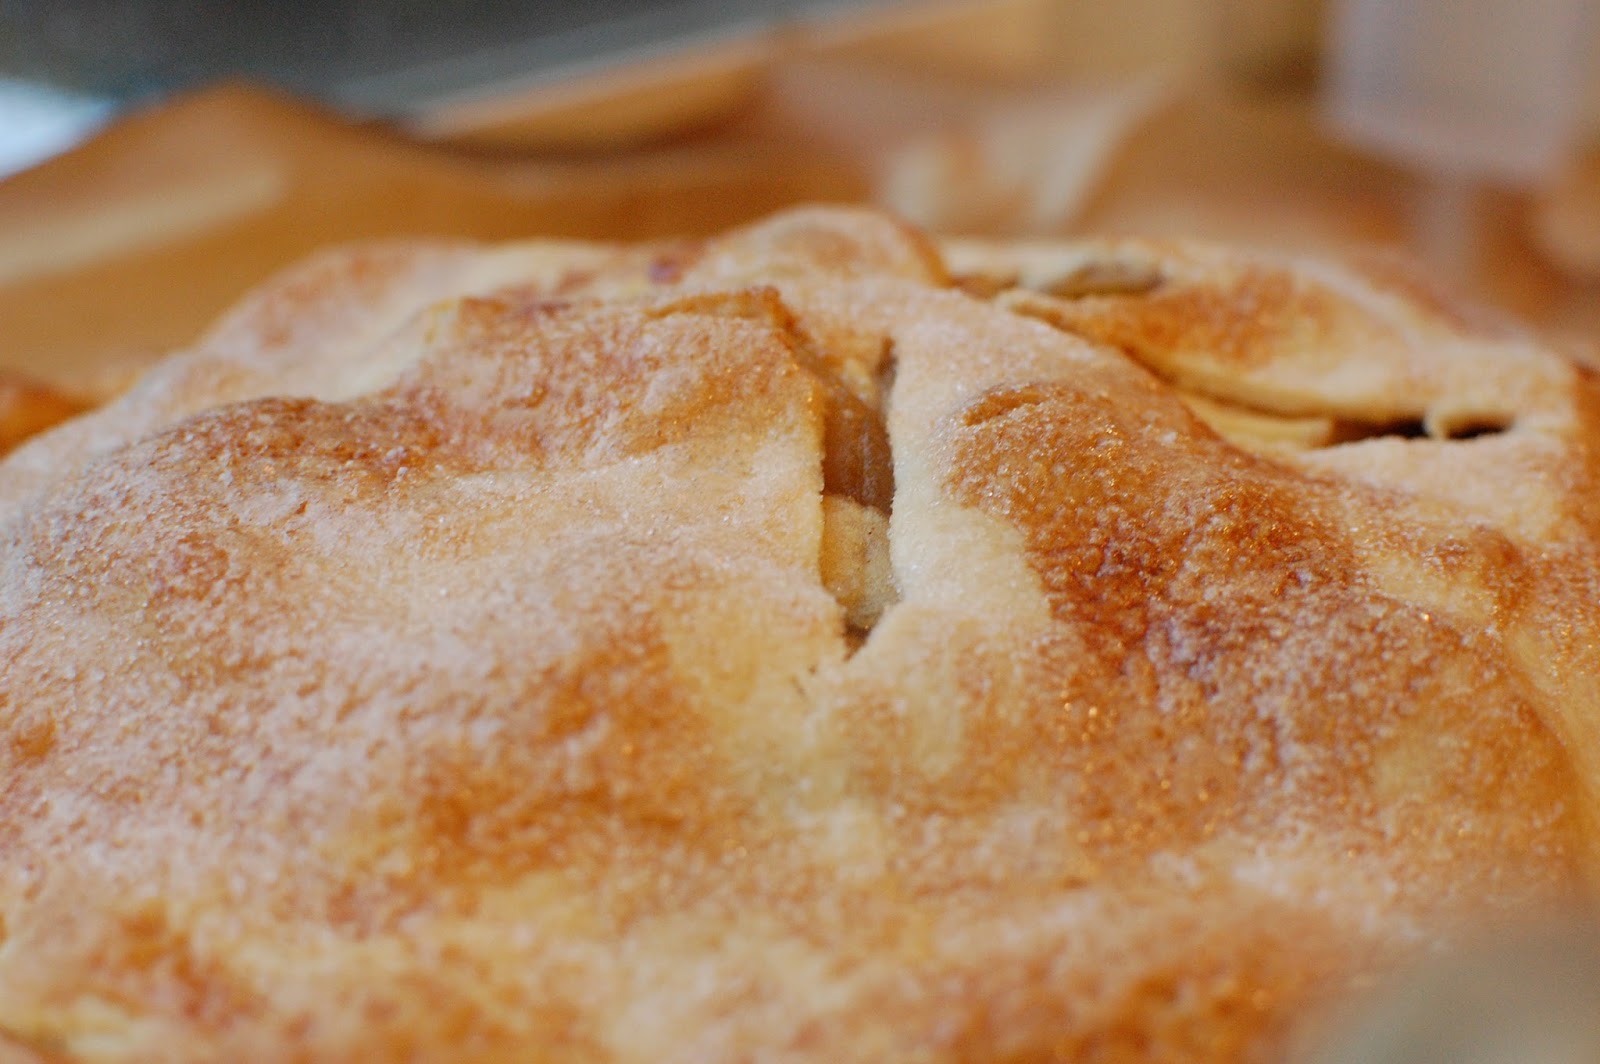
I've made apple tarts, apple cobblers, Dutch apple pies, and apple crisps, but I've never made a true apple pie. Yesterday was the first day I gave it a shot. Disclaimer - I am a very picky pie crust eater. I don't like too thick, too thin, too cakey, or too crisp; I've rarely tasted a pie crust that I really truly love ... there have been one or two. It's why I almost always make tart doughs - they are easier to make, roll out, and consume. So, all of that said, I used Trader Joe's pie crusts for this pie. I didn't want to disappoint myself and ruin this pie with bad pie crust. Now that I have the technique with the filling down, next time, I'll try making my own pie crust. I just need to find the exact right pie crust recipe. If you have one, this filling will do your gorgeous pie crust justice. This filling recipe is from Cook's Country, the October/November issue.
Apple Pie
Ingredients:
1⁄2 cup granulated sugar
1⁄4 cup light brown sugar, packed
1⁄4 teaspoon salt
1 tablespoon lemon juice
1⁄2 teaspoon lemon zest, grated
1⁄8 teaspoon ground cinnamon
2 1⁄2 lbs tart apples, about 5 medium, peeled and cut into 1/4-inch-thick slices
2 1⁄2 lbs sweet apples, about 5 medium, peeled and cut into 1/4-inch-thick slices
1 egg white, beaten lightly
1 teaspoon granulated sugar
2 (9-inch) pie doughs

For the filling and crust:
1. Toss apples, granulated sugar, brown sugar, lemon zest, salt and cinnamon together in a Dutch oven. Cover and cook over medium heat, stirring frequently, until apples are tender when poked with fork but still hold their shape, 15-20 minutes. Transfer apples and their juice to rimmed baking sheet and let cool completely, about 30 minutes.

2. Roll 1 dough into 12-inch circle on lightly floured counter. Loosely roll dough around rolling pin and gently unroll it onto 9-inch pie plate, letting excess dough hang over the edge. Ease dough into plate by gently lifting edge of dough with your hand while pressing into plate bottom with other hand. Leave any dough that overhangs plate in place. Wrap dough-lined plate loosely in plastic and refrigerate until dough is firm, about 30 minutes. Roll other dough into 12-inch circle on lightly floured counter, then transfer to parchment paper-lined baking sheet; cover with plastic and refrigerate for 30 minutes.

3. Adjust oven rack to lowest position and heat oven to 425 degrees. Drain cooked apples thoroughly in colander set over bowl and reserve 1/4 cup of the juice. Stir lemon juice into reserved juice. Spread apples in dough-lined plate, mounding them slightly in the middle, and drizzle with apple juice mixture. Loosely roll remaining dough round around rolling pin and gently unroll it onto filling.

4. Trim overhang to 1/2 inch beyond lip of plate. Pinch edges of top and bottom crusts firmly together. Tuck overhang under itself; folded edge should be flush with edge of plate. Crimp dough around edge of plate using your fingers. Cut four 2-inch slits in top of dough.

For the topping:
5. Brush the surface with egg white and sprinkle with sugar. Set pie on parchment-lined rimmed baking sheet and bake until crust is light golden brown, about 30 minutes. Reduce oven temperature to 375 degrees, rotate baking sheet, and continue to bake until juices are bubbling and crust is deep golden brown, 30-40 minutes longer. Transfer pie to wire rack and let cool until filling has set, about 2 hours; serve slightly warm or at room temperature.

Wednesday, October 28, 2015

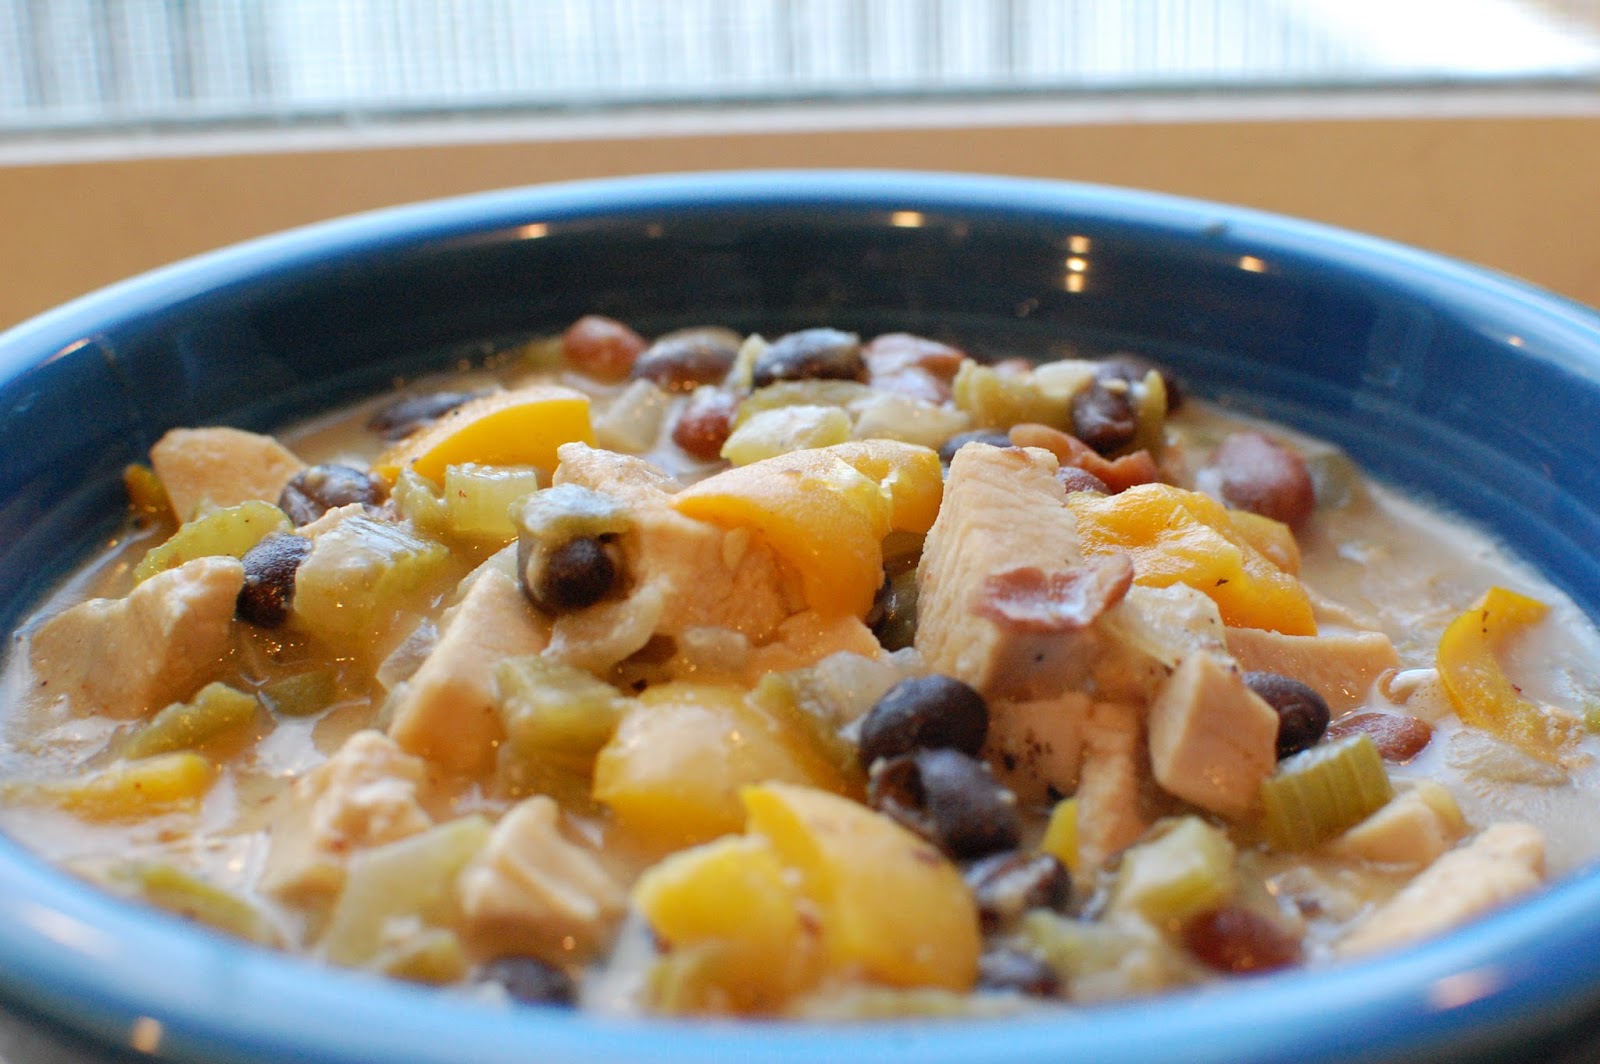
Creamy White Chicken Chili

Fall has definitely begun to arrive here, and chili is one of my favorite fall foods. But, although I like traditional red chili, I much prefer a white chili. When I saw Damaris Philips from Southern at Heart make a white chicken chili, I thought it was time to make a version of her chili but with a few twists of my own. This recipe turned out to be quite a success. Both of my boys gobbled it right up and then commented several times about how good it was. A hit! I reheated it tonight, and it was just as good. I served mine with sour cream and avocado.

Creamy White Chicken Chili
Ingredients:
1 pound boneless, skinless chicken thighs or breasts (or a combination), cut into chunks
2 tbs extra virgin olive oil
Kosher salt and freshly ground white pepper
2 tbs sunflower oil
3 celery stalks, cut into medium dice (about 1 cup)
1 medium onion, cut into medium dice (about 2 cups)
1 yellow bell pepper, cut into medium dice (about 1 cup)
1 jalapeno, small diced
1/4 cup all-purpose flour
4 cups (1 quart) chicken stock, warmed
Two 15-ounce cans beans (I like using a mix - cannelini beans if you want to keep the light color theme, black beans, pinto)
On 7-ounce can chopped green chiles
2 teaspoons garlic powder
2 teaspoons ground cumin
1 teaspoon minced fresh rosemary
1/4 cup heavy cream

1. Preheat the oven to 350 degrees.

2. Drizzle the chicken with the olive oil, season with salt and pepper and put on a baking sheet. Roast until the internal temperature registers 165 degrees F on a meat thermometer, 15 to 25 minutes, depending on the thickness of your meat and the cut you select. Set aside until cool enough to handle, then cut into large dice.

3. Pour the chicken stock into a pan over medium heat to warm it.

4. Meanwhile, add 2 tbs sunflower oil to a large Dutch oven and heat over medium heat. When hot, add the celery, onions, jalapeno, and bell peppers and saute until tender, 4 to 5 minutes. Add the flour, stir to coat the vegetables and cook until the flour starts to brown, about 3 minutes. Whisk in the warm chicken stock, stirring until combined. Add the beans, chiles, garlic powder, cumin, and rosemary and bring to a simmer, cooking until the mixture starts to thicken, 15 to 20 minutes.

5. Add the diced chicken and season with salt and pepper. Cover and cook for another 10 minutes to warm through.

6. Remove from heat and stir in the heavy cream. Serve immediately.

Saturday, October 24, 2015

Baked Blueberry Oatmeal with Pecan Streusel Topping

I just got back from a week of traveling for work, so after a little sleeping in (that's a relative term for me since 6 a.m. is sleeping in), I decided I'd make a cool weather breakfast that's just perfect for fall weather. I saw a recipe on the threemanycooks.com website that I've been wanting to try. I made a few changes to the recipe, but man, oh man, this stuff is GOLD! Pure gold! It's so good. I'm not even a big oatmeal breakfast person, but this stuff will convert me! Next go round, I may reduce the brown sugar a bit in the recipe, just to see if I can eliminate some of the sugar, but this is just too good not to share. Try this oatmeal!

Baked Blueberry Oatmeal with Pecan Streusel Topping
Ingredients:
3 cups old-fashioned oatmeal
1.5 cups brown sugar, divided
1.5 teaspoons baking powder
1/4 teaspoon salt
2 teaspoons cinnamon, divided
3 cups milk (I used skim, but you could use almond, coconut, or 1%, 2%, or whole)
1 tablespoon vanilla extract
2 eggs
2 cups fresh blueberries, divided (I used frozen, not thawed, and they worked great!)
3/4 cup whole wheat flour
6 tablespoons butter, softened
1/2 cup coarsely pecans
half-n-half (optional)

1. Adjust oven rack to center position and heat oven to 375 degrees. Mix oatmeal, 1 cup brown sugar, baking powder, salt, and 1.5 teaspoons cinnamon in a medium bowl.

2. In a separate bowl whisk milk, vanilla, and eggs. Stir milk mixture, then 1 cup of blueberries into oatmeal mixture; turn into a 13- by 9-inch pan.

3. Bake until oatmeal is just starting to set, about 20 minutes.

4. Meanwhile, mix flour, butter, pecans, and remaining brown sugar and cinnamon in a small bowl.

5. Crumble mixture over just set oatmeal, scatter remaining blueberries, and continue to bake until oatmeal is just set and crumble is golden brown, about 20 minutes longer.

6. Dish into bowls; if desired, add a light drizzle of half-n-half.

Saturday, October 17, 2015

Cinnamon Bread

Andy loves cinnamon bread. You know the kind with the swirl running through it, and it looks all lovely and like a cinnamon roll but in a bread? Yup, that's the one. So, when I saw this recipe on Three Many Cooks, I knew I had to try it. I goofed a bit on mine, and ended up making it into two loaves instead of just one giant one - that's what happens when your 9X20 shape is not quite a rectangle, and then you can't get the bread into one loaf pan. But no matter, these loaves still turned out beautifully, if a little smaller than what was intended. I enjoyed a piece for breakfast this morning, toasted with a little butter and cinnamon sugar. Yum.

Cinnamon Bread (from Three Many Cooks)
Ingredients:
2 & 1/2 teaspoons active dry yeast (a normal packet contains 2 & 1/4 tsp)
1 1/2 cups whole milk, warmed to tepid (around 105 degrees)
1 stick (8 tablespoons) butter melted but not hot
4 cups all-purpose flour, plus 2 teaspoons for the swirl (I used 2 cups AP flour and 2 cups white whole wheat flour)
2 tsp salt
1/4 cup granulated sugar, plus 1/4 cup for the swirl
2 teaspoons ground cinnamon, plus 2 teaspoons for the swirl
1 egg, beaten (save this to use in the middle of the process and again before the bread goes in the oven)

1. Sprinkle yeast over warm milk; let stand until yeast dissolves and starts to expand, about 5 minutes; whisk in cooled butter.

2. Meanwhile, pulse 4 cups of flour, salt, 1/4 cup of the sugar, and 2 teaspoon of the cinnamon in the work bowl of a food processor. Add milk mixture; process until it forms a soft, rough mass, about 30 seconds. (Dough will firm up as butter solidifies.)

3. Turn dough onto a lightly floured surface to form a smooth ball; place into a vegetable cooking spray-coated large bowl and then cover with plastic wrap. Place in a warm place until dough doubles, 1 1/2 to 3 hours, depending on room temperature. Mix remaining 1/4 cup of sugar with remaining 2 teaspoons of cinnamon and flour.

4. Turn dough onto a lightly floured work surface, stretching it into a 20-by 9-inch rectangle; brush with egg and sprinkle with cinnamon sugar. With the 9-inch side facing you, roll dough into a tight cylinder and place it in a vegetable cooking spray-coated 9-inch loaf pan. *I rolled mine with a rolling pin - I stretch my pizza dough, but have not had much luck stretching a loaf of bread into a 20X9 rectangle, but give it a shot!

5. Cover pan with a damp towel; let rise until almost doubled in size, 1 hour to 1 1/2 hours, depending on room temperature.

6. Ten to 15 minutes before baking, heat oven to 350 degrees. Brush dough with remaining egg wash and bake until crust is brown, about 45 minutes. Turn loaf onto a wire rack to cool. (Cooled loaf can be wrapped in plastic wrap and stored at room temperature a day or two or wrapped loaf can be placed in a zipper-lock bag and frozen up to 1 month.) Slice, toast, serve!

Tuesday, October 13, 2015

Beef Burrito Casserole

I've been trying out some new recipes lately and this one caught my eye for a couple of reasons: simplicity, it's Mexican, and it has tortillas (and anything that has tortillas is a winner in my book)! This came from Recipe Girl. I made a few minor adjustments, but overall, the recipe is pretty perfect.

Beef Burrito Casserole
Ingredients:
1/2 tbs - 1 tbs extra virgin olive oil
1 pound ground beef
1 small onion, chopped
2 cloves garlic, minced
1/2 teaspoon dried oregano
1 tsp garlic powder
1/2 tsp garlic salt
1/2 teaspoon ground cumin
One 14-ounce can chili beans, drained
Salsa (1 cup + enough for serving with the casserole)
1/3 cup grated Parmesan cheese
8-10 8-inch flour tortillas
2 cups shredded cheddar or jack cheese (or mixture of both)
3 green onions, chopped or fresh chives (which is what I used)
sour cream, salsa and avocado, for serving

1. Put the oil in the bottom of a large nonstick skillet over medium heat. Cook the beef and onion until the meat is no longer pink. Spoon out any fat. Add the garlic, oregano, garlic powder, garlic salt, cumin and beans. Continue to heat for about 5 minutes, then stir in 1 cup of the salsa and the Parmesan cheese.

2. Preheat the oven to 350 degrees F. Spray a 13x9-inch glass baking dish with nonstick spray.

3. Spoon about 1/2 cup of the beef/bean mixture onto the center of a tortilla. Roll up tightly and place the filled tortilla seam-side-down in the pan. Continue with remaining tortillas and filling until you have filled all 8 or 10 tortillas and have snuggled them alongside of one another in the pan. Sprinkle the shredded cheese on top of the rolled-up tortillas and sprinkle the green onions (or chives) on top of the cheese. Cover with greased foil and bake for 20 minutes. Remove the foil and bake for an additional 5 to 10 minutes, until the cheese is hot and bubbly. Serve burritos with sour cream, salsa and avocado, as desired.

Sunday, October 11, 2015

Lemon Chicken

One of my favorite Chinese takeout foods is lemon chicken. Rather than order in tonight, I made my own lemon chicken. This recipe is from Lil Luna's blog, and it was really delicious, although it did take quite a bit of time to fry up all the chicken, so give yourself a bit of time on this one, but, trust me, it's worth it!

Lemon Chicken
Ingredients:

Chicken
2 pounds boneless, skinless chicken breasts, cubed
1/2 - 3/4 cup oil (I used a mixture of sunflower and grapeseed oil)
salt and pepper, to taste
1 & 1/2 cups all-purpose flour
1 cup milk

For the lemon glaze
1/2 cup honey
1/4 cup soy sauce
1/4 cup pineapple juice
1/4 cup brown sugar
Juice of 1 lemon
2 tbs apple cider vinegar
1 tbs olive oil
1 tsp ground lemon pepper
1 tsp. minced garlic

1. Make your glaze. In a medium pan, over medium heat, combine honey, soy sauce, pineapple juice, brown sugar, lemon juice, vinegar, olive oil, lemon pepper and minced garlic. Bring to a boil; reduce heat and simmer about 10-12 minutes, should be slightly thickened.

2. In a large skillet, heat 1 cup oil over medium high heat.

3. Place flour in a Ziploc bag and pour milk into a small bowl. Add 8-10 pieces of chicken to your bag of flour and shake around. Take each piece out and dip in milk and throw back into the flour bag. Shake around and take the chicken out. Repeat until all chicken is coated in flour and milk.

4. Fry chicken in oil for 4-5 minutes on each side or until golden brown.

5. Toss chicken in your glaze mixture and serve warm over rice.