Y'all, we love bread in this house. I don't mean some namby, pamby, I-like-you-and-you-like-me relationship. We have some serious feelings for bread up in this house. And you know how I feel about homemade bread, and could they just already make a candle that smells like yeasty bread rising? I mean, I'd buy them out. So, when I saw this recipe for 30-minute Asiago cheese rolls, I just about died. I was already making Lemon Chicken Orzo Soup, so these rolls were the perfect complement. They were SO easy to make, and even easier to eat, if you know what I mean! My boys used the leftovers to make little sandwiches for their lunches the next day. Thank you, THE RECIPE CRITIC, for this recipe. Genius. I used Parmesan cheese, because I didn't have Asiago on hand, but let's just be real for a minute ... these rolls would work well with Cheddar, Provolone, Pepper Jack, Gruyere, Swiss ... I could go on for days. But instead, I'll just share the recipe. See the original on The Recipe Critic - you'll love her blog.
Asiago Cheese Rolls (quick rise)
Ingredients:
Dough Ingredients:
1 & 1/2 cups warm water
2 Tbsp. sugar
1 Tbsp. yeast (I used active dry yeast)
3 & 1/2 cups flour
1 tsp Salt
Egg Wash Ingredients:
1 egg
1 tablespoon milk
4 oz Asiago Cheese, shredded (I used Parmesan cheese)
1. Preheat oven to 400 degree and line a cookie sheet with parchment paper or Silpat or other silicone baking sheet.
2. To make the dough: Mix warm water, sugar and yeast together. Let that sit for 5 minutes.
3. Add flour and salt to the water, sugar, and yeast. Mix this until smooth and let it raise for 10 minutes. I used my Kitchenaid mixer with the paddle attachment (though you could easily use the bread dough hook).
4. Divide the dough into 12 sections. Roll each section into a ball and place on a parchment lined baking sheet. Let rest for 10 minutes.
5. Whisk the egg and the milk in a small bowl. Brush on the top of each roll with the egg wash. Sprinkle generously with cheese. Bake for 12-15 minutes or until golden brown.
THAT'S IT! Seriously. Heavenly.
Showing posts with label Bread. Show all posts
Wednesday, September 16, 2015
Sunday, August 23, 2015
Strawberry Shortcake Scones
I had some strawberries in the fridge, and while I could eat strawberries plain any day, I wanted to make something a little different. I've had this recipe sitting out on my buffet for a while wanting to give it a shot, so I finally took the plunge. I gotta say - while making these, I was a little concerned they weren't going to turn out well. The dough seemed a little gummy and getting those strawberries to blend into the dough took a little work. But it was worth it. These are delicious. I have been eating them warm with a little dollop of mango/pineapple compote on them. And they are perfect with a cup of tea. This recipe is from Better Homes and Gardens.
Strawberry Shortcake Scones
Ingredients:
1 cup chopped fresh strawberries
2 1/2 cups plus 1 tablespoon all-purpose flour
3 tablespoons granulated sugar
1 tablespoon baking powder
1/4 teaspoon salt
6 tablespoons butter
1 egg, lightly beaten
3/4 cup whole milk ricotta cheese
1/4 cup whipping cream
Whipping cream
Coarse sugar
1. Preheat oven to 400 degrees F. In a small bowl, toss together strawberries and 1 tablespoon flour. In a large bowl combine the 2 1/2 cups flour, 3 tablespoons sugar, baking powder, and salt. Using a pastry blender, cut in butter until mixture resembles coarse crumbs. Make a well in center of the flour mixture; set aside. (I did this in my food processor.)
2. In a medium bowl combine the egg, ricotta, and 1/4 cup whipping cream. Add egg mixture all at once to flour mixture. Add strawberries. Using a fork, stir just until moistened.
3. Turn dough out onto a lightly floured surface. Knead dough by folding and gently pressing it for 10 to 12 strokes or until dough is nearly smooth. Pat dough into a 10x4-inch rectangle. Cut in half lengthwise and in sixths crosswise to make 12 rectangles.
4. Place rectangles 2 inches apart on a parchment paper-lined baking sheet. Brush with additional whipping cream. Sprinkle with coarse sugar. Bake about 16 minutes or until golden brown. Remove scones from baking sheet. Serve warm.
Strawberry Shortcake Scones
Ingredients:
1 cup chopped fresh strawberries
2 1/2 cups plus 1 tablespoon all-purpose flour
3 tablespoons granulated sugar
1 tablespoon baking powder
1/4 teaspoon salt
6 tablespoons butter
1 egg, lightly beaten
3/4 cup whole milk ricotta cheese
1/4 cup whipping cream
Whipping cream
Coarse sugar
1. Preheat oven to 400 degrees F. In a small bowl, toss together strawberries and 1 tablespoon flour. In a large bowl combine the 2 1/2 cups flour, 3 tablespoons sugar, baking powder, and salt. Using a pastry blender, cut in butter until mixture resembles coarse crumbs. Make a well in center of the flour mixture; set aside. (I did this in my food processor.)
2. In a medium bowl combine the egg, ricotta, and 1/4 cup whipping cream. Add egg mixture all at once to flour mixture. Add strawberries. Using a fork, stir just until moistened.
3. Turn dough out onto a lightly floured surface. Knead dough by folding and gently pressing it for 10 to 12 strokes or until dough is nearly smooth. Pat dough into a 10x4-inch rectangle. Cut in half lengthwise and in sixths crosswise to make 12 rectangles.
4. Place rectangles 2 inches apart on a parchment paper-lined baking sheet. Brush with additional whipping cream. Sprinkle with coarse sugar. Bake about 16 minutes or until golden brown. Remove scones from baking sheet. Serve warm.
Thursday, March 26, 2015
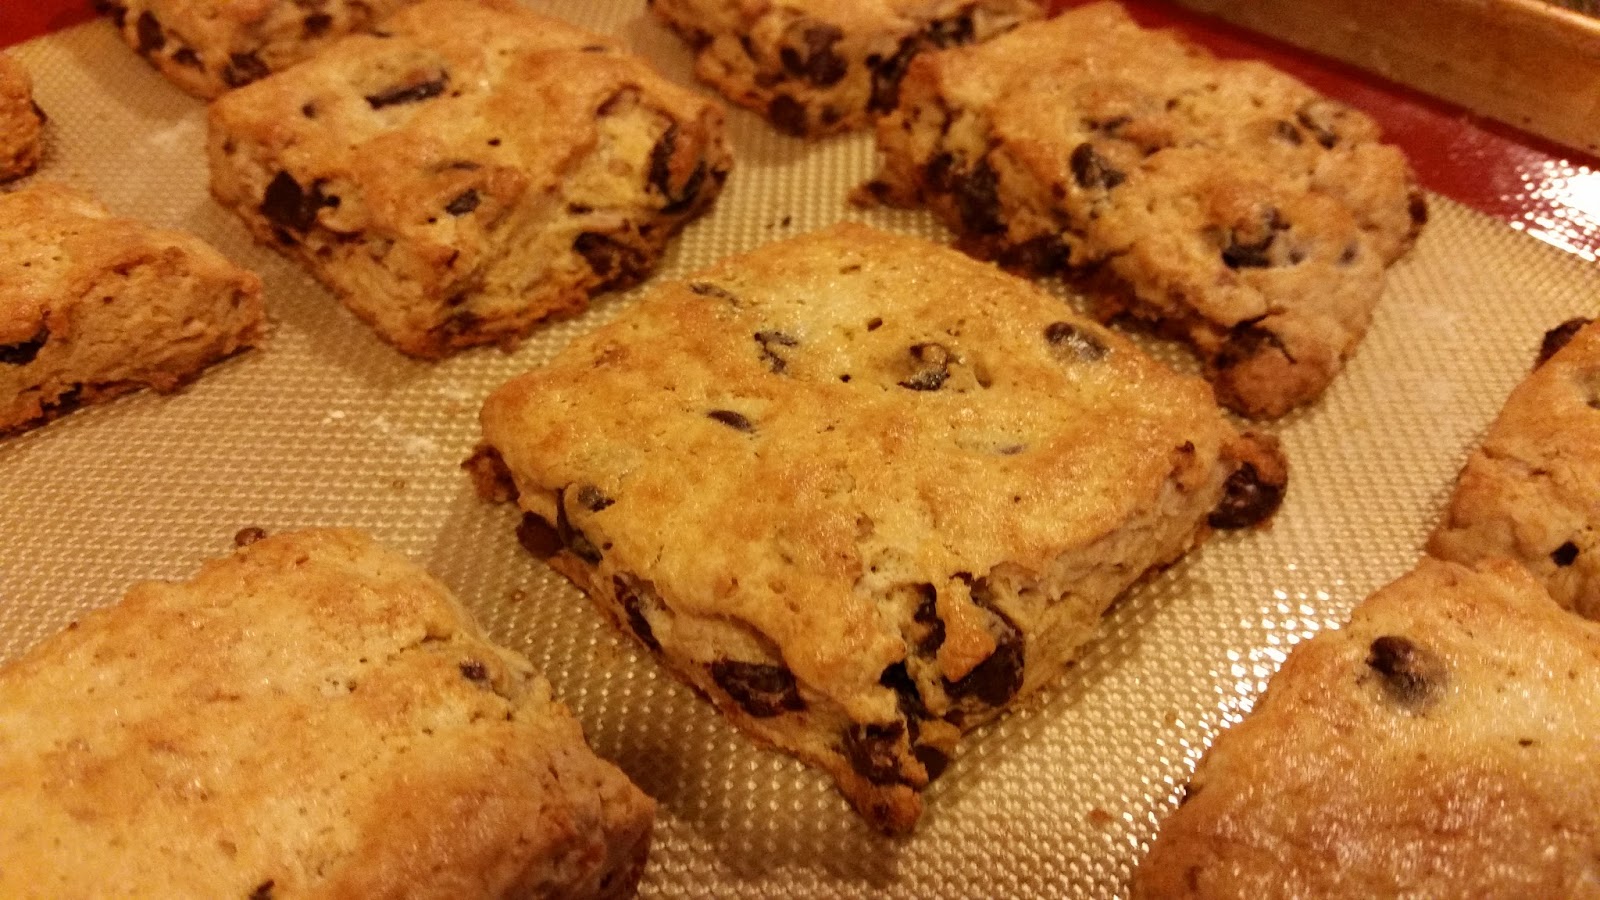
Toasted Coconut and Chocolate Chip Scones
Andy asked me to make scones the other night. This isn't a request I hear often, not that we're scone haters - quite the contrary - but usually, I'll hear a request for brownies or something of the like. As it happened, I was flipping through my Better Homes and Gardens' magazine, and they had four different fun recipes for scones! Kismet, right? Two of the recipes caught my eye, one for a strawberry shortcake scone, and these toasted coconut and chocolate chip scones. I chose the latter because I had all the ingredients on hand, and I was pleasantly surprised to see only one tablespoon of added sugar in these scones. I, of course, swapped out the AP flour for my stand by, whole wheat pastry flour, which did the job beautifully, but I kept everything else the same. These turned out really well. We cut up some strawberries, I whipped up some whipped cream, and we enjoyed a little strawberry shortcake with toasted coconut and chocolate chip scones standing in excellently for the shortcake!
Toasted Coconut and Chocolate Chip Scones (via Better Homes and Gardens)
Ingredients:
1 cup shredded unsweetened coconut
2 1/4 cups all-purpose flour or whole wheat pastry flour
1 tablespoon sugar
1 tablespoon baking powder
1/4 teaspoon salt
6 tablespoons cold butter
1 egg, lightly beaten
3/4 cup whipping cream
1 cup semi-sweet chocolate pieces
1. Preheat oven to 400 degrees. Spread one cup coconut on a baking sheet and bake 5 to 7 minutes or until golden, stirring once. Cool slightly. Transfer to a food processor. Process until finely ground; set aside.
2. In a large bowl combine the flour, sugar, baking powder, and salt. Using a pastry blender or food processor, cut in butter until mixture resembles coarse crumbs. Make a well in the center of the flour mixture; set aside.
3. In a medium bowl combine egg and 3/4 cup whipping cream. Add egg mixture all at once to flour mixture. Add toasted coconut and chocolate pieces. Using a fork, stir just until moistened. Do not overmix! Your scones will be tough.
4. Turn dough out onto a lightly floured surface. Knead dough by folding and gently pressing it for 10 to 12 strokes or until dough is nearly smooth. Pat dough into a 10x4-inch rectangle. Cut in half lengthwise and in sixths crosswise to make 12 rectangles. (Mine made 14!)
5. Place rectangles 2 inches apart on an ungreased baking sheet. Brush wedges with additional whipping cream. Bake 13 to 15 minutes or until golden brown. If desired, top scones with additional shredded coconut the last 5 minutes of baking. Remove scones from baking sheet. Serve warm.
Toasted Coconut and Chocolate Chip Scones (via Better Homes and Gardens)
Ingredients:
1 cup shredded unsweetened coconut
2 1/4 cups all-purpose flour or whole wheat pastry flour
1 tablespoon sugar
1 tablespoon baking powder
1/4 teaspoon salt
6 tablespoons cold butter
1 egg, lightly beaten
3/4 cup whipping cream
1 cup semi-sweet chocolate pieces
1. Preheat oven to 400 degrees. Spread one cup coconut on a baking sheet and bake 5 to 7 minutes or until golden, stirring once. Cool slightly. Transfer to a food processor. Process until finely ground; set aside.
2. In a large bowl combine the flour, sugar, baking powder, and salt. Using a pastry blender or food processor, cut in butter until mixture resembles coarse crumbs. Make a well in the center of the flour mixture; set aside.
3. In a medium bowl combine egg and 3/4 cup whipping cream. Add egg mixture all at once to flour mixture. Add toasted coconut and chocolate pieces. Using a fork, stir just until moistened. Do not overmix! Your scones will be tough.
4. Turn dough out onto a lightly floured surface. Knead dough by folding and gently pressing it for 10 to 12 strokes or until dough is nearly smooth. Pat dough into a 10x4-inch rectangle. Cut in half lengthwise and in sixths crosswise to make 12 rectangles. (Mine made 14!)
5. Place rectangles 2 inches apart on an ungreased baking sheet. Brush wedges with additional whipping cream. Bake 13 to 15 minutes or until golden brown. If desired, top scones with additional shredded coconut the last 5 minutes of baking. Remove scones from baking sheet. Serve warm.
Saturday, January 24, 2015
Pre-Workout Energy Muffins - via Running on Veggies
Kara Goucher, a top notch women's elite runner and a running hero of mine, has been referencing recipes from a website called Running on Veggies. Today, I checked them out and ran across this muffin recipe. This is super because they are easily modified based on what you have or want to put in it. I'm re-posting the recipe from their website, but I used blueberries instead of apples, and I didn't have Maca, so I didn't use that. I'm currently out of almond milk, so I used non-fat milk. My batch made 15 regular muffins, and they are quite tasty. I'm already planning the next batch.
Pre-Workout Energy Muffins
Ingredients:
2 1/2 cups of oats
1/4 cup ground flaxseeds ( do not use whole flaxseeds)
3 tablespoons of Maca ( you can omit, but I love this superfood great for energy and endurance)
2 teaspoons of cinnamon
2 teaspoons of baking powder
Wet:
3 ripe bananas
1/2 cup unsweetened apple sauce
1 cup unsweetened almond milk (any non-dairy milk can work)
1 teaspoon of vanilla extract
1 apple pealed and cubed
optional
8 teaspoons unsweetened fruit jam
1 cup sliced strawberries
1. Preheat oven to 350 degrees.
2. Grind oats in a food processor until you get a “flour”- such as oat flour. Add the rest of your dry in ingredients. Then add Wet ingredients, (besides apple) into the food processor making sure your bananas are mashed!
2. Once everything is combined, fold in your apple that is cubed (pears may work, or blueberries whatever you like). You can omit this step but it takes the muffin to another level!
3. In a muffin pan, scoop a tablespoon worth of batter into the mold, then take a teaspoon worth of jelly fill the middle with jelly and a slice of strawberry. Then cover with more batter around a tablespoons worth. top with strawberry. Bake for 15 minutes.
Pre-Workout Energy Muffins
Ingredients:
2 1/2 cups of oats
1/4 cup ground flaxseeds ( do not use whole flaxseeds)
3 tablespoons of Maca ( you can omit, but I love this superfood great for energy and endurance)
2 teaspoons of cinnamon
2 teaspoons of baking powder
Wet:
3 ripe bananas
1/2 cup unsweetened apple sauce
1 cup unsweetened almond milk (any non-dairy milk can work)
1 teaspoon of vanilla extract
1 apple pealed and cubed
optional
8 teaspoons unsweetened fruit jam
1 cup sliced strawberries
1. Preheat oven to 350 degrees.
2. Grind oats in a food processor until you get a “flour”- such as oat flour. Add the rest of your dry in ingredients. Then add Wet ingredients, (besides apple) into the food processor making sure your bananas are mashed!
2. Once everything is combined, fold in your apple that is cubed (pears may work, or blueberries whatever you like). You can omit this step but it takes the muffin to another level!
3. In a muffin pan, scoop a tablespoon worth of batter into the mold, then take a teaspoon worth of jelly fill the middle with jelly and a slice of strawberry. Then cover with more batter around a tablespoons worth. top with strawberry. Bake for 15 minutes.
Friday, July 25, 2014
Double Chocolate Banana Bread via the Smitten Kitchen
Still on the hunt for soft foods, today I decided to try out Smitten Kitchen's Double Chocolate Banana Bread. If you haven't tried recipes from Smitten Kitchen, you should definitely try one out soon. They are so delicious. I haven't made one that I've been unhappy about. This one is no exception. The richness of this chocolate bread is amazing. You feel like you're eating dessert, but not because it's so sugary; rather, it's due to the double dose of chocolate you get in this bread. It has beautiful flavor with the banana in the background sending its unique sweetness through the quick bread.
Double Chocolate Banana Bread via the Smitten Kitchen
Ingredients:
3 medium ripe bananas
1/2 cup butter, melted
3/4 cup brown sugar
1 large egg
1 teaspoon pure vanilla extract
1 teaspoon baking soda
1/4 teaspoon table salt
1/2 teaspoon ground cinnamon
1 cup all-purpose flour or whole wheat pastry flour
1/2 cup cocoa powder
1 cup semisweet or bittersweet chocolate chunks or chips
1. Heat your oven to 350°F. Butter a 9×5-inch loaf pan, or spray it with a nonstick baking spray.
2. Mash bananas in the bottom of a large bowl. Whisk in melted butter, then brown sugar, egg, and vanilla. Place baking soda, salt, cinnamon, flour and cocoa powder in a sifter or fine-mesh strainer and sift over wet ingredients. Stir dry and wet ingredients until just combined. Stir in chocolate chunks or chips.
3. Pour into prepared pan and bake 55 to 65 minutes, until a tester or toothpick inserted into the center of the cake comes out batter-free. Cool in pan for 10 to 15 minutes, then run a knife around the edge and invert it out onto a cooling rack. Serve warm or at room temperature.
Double Chocolate Banana Bread via the Smitten Kitchen
Ingredients:
3 medium ripe bananas
1/2 cup butter, melted
3/4 cup brown sugar
1 large egg
1 teaspoon pure vanilla extract
1 teaspoon baking soda
1/4 teaspoon table salt
1/2 teaspoon ground cinnamon
1 cup all-purpose flour or whole wheat pastry flour
1/2 cup cocoa powder
1 cup semisweet or bittersweet chocolate chunks or chips
1. Heat your oven to 350°F. Butter a 9×5-inch loaf pan, or spray it with a nonstick baking spray.
2. Mash bananas in the bottom of a large bowl. Whisk in melted butter, then brown sugar, egg, and vanilla. Place baking soda, salt, cinnamon, flour and cocoa powder in a sifter or fine-mesh strainer and sift over wet ingredients. Stir dry and wet ingredients until just combined. Stir in chocolate chunks or chips.
3. Pour into prepared pan and bake 55 to 65 minutes, until a tester or toothpick inserted into the center of the cake comes out batter-free. Cool in pan for 10 to 15 minutes, then run a knife around the edge and invert it out onto a cooling rack. Serve warm or at room temperature.
Thursday, June 26, 2014
Cast-Iron Biscuits
Y'all know I make a lot of biscuits. They are so utilitarian and, when cooked properly, are light, fluffy and delicious. I use biscuits for shortcake, breakfast sandwiches, plain with butter and honey, as a starch for my salad...just about anything. I discovered the fastest, easiest recipe in the world that produces consistently fluffy, golden biscuits every single time. I've been using it straight for two months in my house, and I'm thinking for the rest of my life. This is Jeff Mauro's (a.k.a. the Sandwich King) recipe, and it only requires four ingredients. I'm including the extra butter he uses to top the biscuits, because what isn't better with butter?, but I don't typically add it at the end...it doesn't really need it. But, in case you want a browner biscuit, go for the butter. You do need a cast-iron skillet for this one. If you don't have one, run right out to your local hardware store and pick one up. Mine resides permanently on my stove top...that's how often I use it.
Cast-Iron Biscuits
Ingredients:
4 cups self-rising flour, plus more for dusting - yes, it must be self-rising...don't have self-rising? *See below for how to make your own.
1 stick good butter, plus 3 tablespoons melted
2 to 3 cups cold buttermilk
1 tablespoon vegetable oil
1. Preheat the oven to 425 degrees F. Place heavy cast-iron skillet into oven to preheat. Chill a large mixing bowl, pastry cutter, flour and 1 stick butter in the freezer 15 minutes before assembling the biscuits.
2. Add the flour to the chilled mixing bowl. Working quickly, cut 1 stick butter into the flour using the chilled pastry cutter (or your fingers); the goal here is pea-size balls of butter. In batches, add in the buttermilk until the dough is cohesive yet still moist. Turn the dough out onto a floured surface and lightly press into a 1-inch-thick round. Using a biscuit cutter cut out 12 biscuits. (I do all my mixing in the food processor!)
3. Carefully remove the skillet from the oven and add the oil. Place the dough rounds into the hot skillet, right up against each other, and brush with the 3 tablespoons melted butter. Bake until golden brown, about 15 minutes.
*Make your own self-rising flour:
1 cup AP flour
1.5 tsp baking powder
1/2 tsp salt
Sift or stir together.
Cast-Iron Biscuits
Ingredients:
4 cups self-rising flour, plus more for dusting - yes, it must be self-rising...don't have self-rising? *See below for how to make your own.
1 stick good butter, plus 3 tablespoons melted
2 to 3 cups cold buttermilk
1 tablespoon vegetable oil
1. Preheat the oven to 425 degrees F. Place heavy cast-iron skillet into oven to preheat. Chill a large mixing bowl, pastry cutter, flour and 1 stick butter in the freezer 15 minutes before assembling the biscuits.
2. Add the flour to the chilled mixing bowl. Working quickly, cut 1 stick butter into the flour using the chilled pastry cutter (or your fingers); the goal here is pea-size balls of butter. In batches, add in the buttermilk until the dough is cohesive yet still moist. Turn the dough out onto a floured surface and lightly press into a 1-inch-thick round. Using a biscuit cutter cut out 12 biscuits. (I do all my mixing in the food processor!)
3. Carefully remove the skillet from the oven and add the oil. Place the dough rounds into the hot skillet, right up against each other, and brush with the 3 tablespoons melted butter. Bake until golden brown, about 15 minutes.
*Make your own self-rising flour:
1 cup AP flour
1.5 tsp baking powder
1/2 tsp salt
Sift or stir together.
Tuesday, May 13, 2014
Date and Walnut Bread
Another dish I made while we were carb loading was this Date and Walnut Bread. This is a dense bread, but it's quite good. I love that it's not overly sweet, but it's still sweet enough to capture my sweet tooth. I actually didn't eat this for breakfast, but I took it as an afternoon snack or an after workout treat. This recipe came from our Runner's World Athlete's Palate book and was contributed by Patricia Wells.
Date & Walnut Bread
Ingredients:
1 teaspoon walnut oil
1 1/2 cups dates, pitted and cubed
1/2 cup walnut halves, toasted and coarsely chopped
1/2 teaspoon baking soda
1/2 teaspoon fine sea salt
3/4 cup hottest possible tap water
1/2 cup honey
2 large eggs, lightly beaten
1 teaspoon vanilla extract
1 1/2 cups unbleached, all-purpose flour **I used whole wheat pastry flour instead.**
1. Preheat the oven to 375°. Coat a nonstick one-quart rectangular bread pan with the walnut oil. Set aside.
2. In a large bowl, combine dates, walnuts, baking soda, salt, and honey. Add hot water and stir to blend. Add eggs and vanilla to the date mixture and blend thoroughly. Slowly add flour, blend well. The batter will be fairly thick.
3. Pour batter into pan, evening out the top with a spatula. Place the pan in the center of the oven and bake until a toothpick inserted into the center of the bread comes out clean, 40 to 50 minutes.
4. Remove from the pan and let cool for at least an hour. Bread can be stored for up to three days, tightly wrapped in plastic. One loaf, 12 slices.
Date & Walnut Bread
Ingredients:
1 teaspoon walnut oil
1 1/2 cups dates, pitted and cubed
1/2 cup walnut halves, toasted and coarsely chopped
1/2 teaspoon baking soda
1/2 teaspoon fine sea salt
3/4 cup hottest possible tap water
1/2 cup honey
2 large eggs, lightly beaten
1 teaspoon vanilla extract
1 1/2 cups unbleached, all-purpose flour **I used whole wheat pastry flour instead.**
1. Preheat the oven to 375°. Coat a nonstick one-quart rectangular bread pan with the walnut oil. Set aside.
2. In a large bowl, combine dates, walnuts, baking soda, salt, and honey. Add hot water and stir to blend. Add eggs and vanilla to the date mixture and blend thoroughly. Slowly add flour, blend well. The batter will be fairly thick.
3. Pour batter into pan, evening out the top with a spatula. Place the pan in the center of the oven and bake until a toothpick inserted into the center of the bread comes out clean, 40 to 50 minutes.
4. Remove from the pan and let cool for at least an hour. Bread can be stored for up to three days, tightly wrapped in plastic. One loaf, 12 slices.
Saturday, April 26, 2014
Soft Whole Wheat Dinner Rolls
One of my tasks at Thanksgiving and Easter is to bring rolls. I like to try different things until I find one that I can't live without. This year at Easter, I found this recipe for soft 100% whole wheat dinner rolls from a blog called An Oregon Cottage. These were super easy to make, they proofed up quickly, baked off beautifully, and tasted really amazing. I might hang on to this one! Check out the Oregon Cottage site; she has a lot of good recipes, and she provides step-by-step pictures of how to make these rolls, something that is super helpful if you're not all that comfortable making bread.
Soft Whole Wheat Dinner Rolls
Ingredients:
2 tbs. dry yeast
1/2 c. warm water
1/2 c. butter, softened
1/4 c. honey
3 eggs
1 cup buttermilk or milk
4-1/2-5 cups whole wheat flour
1-1/2 tsp. salt
1. Dissolve the yeast in the 1/2 cup warm water in a glass measure. Set aside.
2. Cream the butter and honey in the bowl of a stand mixer with the paddle attachment. Add the eggs and mix, scraping the sides. Add the milk and yeast mixture.
3. Add 4-1/2 cups of flour and the salt, mixing until combined. Change to dough hook and knead for 2-3 minutes only, just until no longer tacky, adding a tablespoon or two of flour, if needed.
4. Let sit in bowl, covered, to rise for one hour. Turn out onto a floured surface and knead a couple of times, then let rest 3 minutes.
5. Divide into 24 equal pieces, shaping each into a ball and placing in a buttered 13×9-inch baking dish with the pieces touching.
6. Let rise, covered for 1 hour.
7. Preheat oven to 350 degrees.
8. Bake for 20-25 minutes until golden brown.
Soft Whole Wheat Dinner Rolls
Ingredients:
2 tbs. dry yeast
1/2 c. warm water
1/2 c. butter, softened
1/4 c. honey
3 eggs
1 cup buttermilk or milk
4-1/2-5 cups whole wheat flour
1-1/2 tsp. salt
1. Dissolve the yeast in the 1/2 cup warm water in a glass measure. Set aside.
2. Cream the butter and honey in the bowl of a stand mixer with the paddle attachment. Add the eggs and mix, scraping the sides. Add the milk and yeast mixture.
3. Add 4-1/2 cups of flour and the salt, mixing until combined. Change to dough hook and knead for 2-3 minutes only, just until no longer tacky, adding a tablespoon or two of flour, if needed.
4. Let sit in bowl, covered, to rise for one hour. Turn out onto a floured surface and knead a couple of times, then let rest 3 minutes.
5. Divide into 24 equal pieces, shaping each into a ball and placing in a buttered 13×9-inch baking dish with the pieces touching.
6. Let rise, covered for 1 hour.
7. Preheat oven to 350 degrees.
8. Bake for 20-25 minutes until golden brown.
Sunday, February 23, 2014
Carrot Applesauce Whole Wheat Muffins
My friend Brita and I email pretty regularly. We talk a lot about the food we're preparing for the week ahead. She mentioned that she was making the 100 Days of Real Food Carrot Applesauce Muffins. The thought intrigued me, so I went to the website, found the recipe and decided to make them myself. I'm so glad she told me about these. They are delightful! Moist, sweet, but not overly sweet, tender, delicious, and Andy and the boys gobbled them up asking for more. Nice. This will definitely be a staple in our house. I've linked to the 100 Days of Real Food site above, or here's the exact recipe below. My batch made 12 normal muffins and eight mini muffins.
Carrot Applesauce Whole Wheat Muffins (Recipe from 100 Days of Real Food)
Ingredients:
1.5 cups whole-wheat flour
1 teaspoon baking soda
1 teaspoon ground cinnamon
1/2 teaspoon ground ginger
1/2 teaspoon salt
1/2 cup butter (1 stick), softened (but not melted)
1/2 cup honey
1 egg
1 teaspoon pure vanilla extract
1 cup unsweetened applesauce
3/4 cup carrot shreds
1. Preheat your oven to 350 degrees F. Line a muffin pan with paper, foil, or silicone liners, and set aside.
2. In a medium bowl whisk together the flour, baking soda, cinnamon, ginger, and salt.
3. In a large bowl fitted with an electric whisk (or beaters), mix the butter, honey, egg and vanilla together on medium speed. Turn the speed down and slowly add in the flour mixture until well combined. The batter will be fairly thick at this point.
4. Using a spatula, carefully fold in the applesauce and carrots. Divide the batter evenly among the muffin cups. Bake for 22 to 24 minutes or until a toothpick comes and muffins are beginning to turn golden brown on top. Enjoy!
Carrot Applesauce Whole Wheat Muffins (Recipe from 100 Days of Real Food)
Ingredients:
1.5 cups whole-wheat flour
1 teaspoon baking soda
1 teaspoon ground cinnamon
1/2 teaspoon ground ginger
1/2 teaspoon salt
1/2 cup butter (1 stick), softened (but not melted)
1/2 cup honey
1 egg
1 teaspoon pure vanilla extract
1 cup unsweetened applesauce
3/4 cup carrot shreds
1. Preheat your oven to 350 degrees F. Line a muffin pan with paper, foil, or silicone liners, and set aside.
2. In a medium bowl whisk together the flour, baking soda, cinnamon, ginger, and salt.
3. In a large bowl fitted with an electric whisk (or beaters), mix the butter, honey, egg and vanilla together on medium speed. Turn the speed down and slowly add in the flour mixture until well combined. The batter will be fairly thick at this point.
4. Using a spatula, carefully fold in the applesauce and carrots. Divide the batter evenly among the muffin cups. Bake for 22 to 24 minutes or until a toothpick comes and muffins are beginning to turn golden brown on top. Enjoy!
Sunday, December 22, 2013
Whole Wheat Honey Oatmeal Bread
Can you tell I'm on a bread-making kick right now? It relaxes me, I know what I'm feeding my family and can rest assured that there aren't secret, yucky ingredients I don't want in my bread, and the smell of freshly baked bread is just plain heavenly. I saw A Cozy Kitchen using a recipe for a whole wheat honey oatmeal bread, and it turns out the recipe came from a blog called Girls vs. Dough (isn't that a great title?). I tracked down the recipe and gave it a shot. This recipes makes one giant loaf...and when I say giant, I mean it. This is the tallest bread I've ever made. But it's a relatively easy recipe, and the bread is quite tasty and so pretty. So, I'm re-posting, but the recipe is 100% from the Girl Vs. Dough blog site, which I've linked to so you can see the original.
Whole Wheat Honey Oatmeal Bread
Ingredients:
1 cup water
1 cup milk
2 & 1/4 teaspoons (1 packet) active dry yeast
2 tablespoons honey
2.5 cups whole wheat flour
2 cups bread or all-purpose flour
1 cup rolled oats, plus more for topping loaf
4 tablespoons (1/2 stick) unsalted butter, melted and cooled slightly
1 tablespoon salt
1. Pour water and milk into a microwave-safe bowl; heat 30 to 45 seconds until warm (about 115 degrees F). Pour into the bowl of a stand mixer.
2. Add yeast and honey. Let sit 10 minutes until yeast is foamy.
3. Stir in flours, oats, butter and salt. Using a dough hook, knead on medium speed 6 minutes until dough is smooth, elastic and only slightly sticky (alternatively, knead by hand 10 to 15 minutes on a lightly floured surface until smooth, elastic and only slightly sticky). Keep dough in bowl and cover with a tea towel. Let rise 1 hour until doubled.
4. When dough is doubled, punch down and transfer to a lightly floured surface. Press into an 8-by-8-inch square, then tuck in sides slightly and roll up into a log. Transfer to a lightly greased 9-by-5-inch loaf pan, seam-side down. Cover with a tea towel and let rise 30 to 40 minutes until dough reaches the edges of the pan (but not doubled).
5. Heat oven to 400 degrees F (375 degrees F if loaf pan is dark or nonstick). Sprinkle oats on top of risen loaf. Bake 40 to 50 minutes, rotating halfway through baking, until loaf is deep brown on top and sounds hollow when tapped on the bottom. Remove from loaf pan and transfer to a cooling rack to cool completely.
Tuesday, December 3, 2013
Homemade Bread 1/2 & 1/2
Many would call this recipe a whole wheat bread because half the flour is indeed whole wheat. But half of it is all-purpose flour, so I feel weird calling it a whole wheat loaf of bread...when I hear whole wheat, I expect that it's only made with whole wheat flour. That's certainly not true in the grocery stores, but homemade bread? It should be. I hope you all had a wonderful Thanksgiving. We had a great time with a lot of great food, friends, games and a family Turkey Trot to kick off the morning. As the days passed, the boys and I were longing for Andy's turkey sandwiches. I don't know what my husband does to these sandwiches to make them so good, but he is able to turn four simple ingredients into the tastiest sandwich known to man. We were out of bread, and I wasn't about to miss out on these sandwiches, so I decided to make a couple of loaves, some homemade mayonnaise and let Andy do the rest with salt and pepper and leftover turkey.
This recipe for the bread comes from the Kitchn, which is a wonderful blog for both recipes as well as basic and advanced techniques for cooking. She gives step-by-step directions with pictures, so I'll point you to her blog for the recipe, but this was probably the easiest yeast bread I've ever made, except for the English Muffin Toast. It does take time, yes, but it is so worth it. This bread is chewy, but soft and light (thanks to the AP flour), yet still packs a nutritional punch. (I'm still working on finding a yeast dough that is 100% whole wheat that can get this light but chewy texture...I'll find it!) I only ran into one problem in the preparation. On my last rise, when the dough is in the loaf pans, they didn't rise like they should. I simply pulled them down off the top of my fridge (which is where I let all my yeast doughs proof and rise - super warm up there) and put them on top of the preheating oven for an extra 20 minutes. Boom! They rose beautifully.
If you're a fan of homemade bread (and who isn't??), try this recipe out...super yummy!!!
The Kitchn Whole Wheat Bread (what I call 1/2 & 1/2 bread).
*Don't mind my lumpy bread - I'm still working on perfecting the pinching technique! It didn't affect the taste one little bit!
This recipe for the bread comes from the Kitchn, which is a wonderful blog for both recipes as well as basic and advanced techniques for cooking. She gives step-by-step directions with pictures, so I'll point you to her blog for the recipe, but this was probably the easiest yeast bread I've ever made, except for the English Muffin Toast. It does take time, yes, but it is so worth it. This bread is chewy, but soft and light (thanks to the AP flour), yet still packs a nutritional punch. (I'm still working on finding a yeast dough that is 100% whole wheat that can get this light but chewy texture...I'll find it!) I only ran into one problem in the preparation. On my last rise, when the dough is in the loaf pans, they didn't rise like they should. I simply pulled them down off the top of my fridge (which is where I let all my yeast doughs proof and rise - super warm up there) and put them on top of the preheating oven for an extra 20 minutes. Boom! They rose beautifully.
If you're a fan of homemade bread (and who isn't??), try this recipe out...super yummy!!!
The Kitchn Whole Wheat Bread (what I call 1/2 & 1/2 bread).
*Don't mind my lumpy bread - I'm still working on perfecting the pinching technique! It didn't affect the taste one little bit!
Sunday, November 17, 2013
Whole Wheat English Muffin Bread
Do you watch Cook's Country on PBS? If not, you're missing out. They have wonderful recipes, and I love watching them bring life to some foods I've longed to try and make but have never gotten around to it. Yesterday, I watched them make an English Muffin Bread that looked so easy, I just had to give it a try tonight! And boy did it turn out. It's wonderful and only took an hour to rise. Best part about it? Have you checked the ingredients in the English muffins at the store? They are chocked full of fillers and nasty things I can't even pronounce. This English Muffin bread has six ingredients in it...that's it. Six absolutely normal ingredients I can pronounce and know where they come from. All four of us had a thick slice for an evening snack tonight, and it had the requisite lightly crunchy outer crust and the airy, holey sponge-like, but chewy interior that is the trademark of a good English muffin. I modified the recipe just a bit using whole wheat flour and making only one loaf, but from the reaction from my family, I'll double up next time and make two loaves. This bread is going to disappear quickly! Cook's Country recommends using bread flour, which is a great alternative, but I wanted the whole wheat punch, so I used white whole wheat flour. Delicious.
Whole Wheat English Muffin Bread
Ingredients:
MAKES 2 LOAVES
Cornmeal
5 cups (27 1/2 ounces) whole wheat flour
4 1/2 teaspoons instant or rapid-rise yeast *See note below
1 tablespoon sugar
2 teaspoons salt
1 teaspoon baking soda
3 cups whole milk, heated to 120 degrees
1. Grease two 8½ by 4½-inch loaf pans and dust with cornmeal. Combine flour, yeast, sugar, salt, and baking soda in large bowl. Stir in hot milk until combined, about 1 minute. Cover dough with greased plastic wrap and let rise in warm place for 30 minutes, or until dough is bubbly and has doubled.
2. Stir dough and divide between prepared loaf pans, pushing into corners with greased rubber spatula. (Pans should be about two-thirds full.) Cover pans with greased plastic and let dough rise in warm place until it reaches edge of pans, about 30 minutes. Adjust oven rack to middle position and heat oven to 375 degrees.
3. Discard plastic and transfer pans to oven. Bake until bread is well browned and registers 200 degrees, about 30 minutes, rotating and switching pans halfway through baking. Turn bread out onto wire rack and let cool completely, about 1 hour. Slice, toast, and serve.
*If you don't have instant or rapid-rise yeast, you can use active dry yeast. Just mix the yeast in the milk and dissolve for five minutes before mixing with the dry ingredients.*
Whole Wheat English Muffin Bread
Ingredients:
MAKES 2 LOAVES
Cornmeal
5 cups (27 1/2 ounces) whole wheat flour
4 1/2 teaspoons instant or rapid-rise yeast *See note below
1 tablespoon sugar
2 teaspoons salt
1 teaspoon baking soda
3 cups whole milk, heated to 120 degrees
1. Grease two 8½ by 4½-inch loaf pans and dust with cornmeal. Combine flour, yeast, sugar, salt, and baking soda in large bowl. Stir in hot milk until combined, about 1 minute. Cover dough with greased plastic wrap and let rise in warm place for 30 minutes, or until dough is bubbly and has doubled.
2. Stir dough and divide between prepared loaf pans, pushing into corners with greased rubber spatula. (Pans should be about two-thirds full.) Cover pans with greased plastic and let dough rise in warm place until it reaches edge of pans, about 30 minutes. Adjust oven rack to middle position and heat oven to 375 degrees.
3. Discard plastic and transfer pans to oven. Bake until bread is well browned and registers 200 degrees, about 30 minutes, rotating and switching pans halfway through baking. Turn bread out onto wire rack and let cool completely, about 1 hour. Slice, toast, and serve.
*If you don't have instant or rapid-rise yeast, you can use active dry yeast. Just mix the yeast in the milk and dissolve for five minutes before mixing with the dry ingredients.*
Saturday, August 17, 2013
Baked Doughnut Holes
Many people love doughnuts. But my boys adore doughnuts. They talk about them constantly. They ask if we can get them for breakfast more often than I'd care to admit. So, I've previously made Doughnut Muffins, which we all thoroughly enjoyed. But my friend Tori sent me a recipe for baked doughnuts that I thought I'd try. That recipe is for a spiced pumpkin doughnut, something Andy and I would enjoy, but probably not my boys. So, I rounded up a recipe for a more basic doughnut and gave them a whirl. These were fast and easy, and they are delicious. My boys have devoured their allotted two (one of each kind) for the evening already and told me that I should market them at Safeway. Silly boys. These aren't good for you...what doughnut is? But they are better than fried doughnuts and are about 101 calories a piece. I'm thinking this recipe is a keeper. It is inspired by a recipe I found on The Faux Martha blog.
Baked Doughnut Holes
Ingredients:
1/3 cup milk
1 tsp. lemon juice
3 tbsp. unsalted butter, melted
1 cup whole wheat pastry flour
1 tsp. aluminum-free baking powder
1/4 tsp. salt
1/8 tsp. nutmeg, fresh
1/4 cup sugar
2 tbsp. honey
1 large egg
1 tbs. vanilla extract
Topping
5 tbsp. unsalted butter, melted
1/4 c. pure cane sugar
1 tbs. cinnamon
1/4 c. powdered sugar
1. Preheat oven to 400 degrees.
2. In a small bowl, mix together milk and lemon juice. Let sit for 5 minutes to curdle. Melt butter in a small bowl and set aside to cool.
3. Meanwhile, whisk together the flour, baking powder, sea salt, and nutmeg in a large bowl. Set aside.
Into the cooled butter, whisk in sugar, honey, egg, and vanilla until combined. Add in milk/lemon juice combo.
4. Whisk together wet and dry ingredients until just combined. Over-mixing will create a dense doughnut.
Spray mini muffin tin pan. Evenly distribute batter. (This makes 20 doughnuts.)
5. Bake for 9 minutes. Allow to cool at least 1 minute before removing from tin and placing on a cooling rack to cool completely.
6. Meanwhile, make topping. Melt butter. In a small bowl, mix together cinnamon and sugar. In a separate bowl, add in powdered sugar.
7. Dip each doughnut hole in butter before either coating in the cinnamon/sugar mixture or powdered sugar mixture (10 of each). Place back on cooling rack until dried.
Baked Doughnut Holes
Ingredients:
1/3 cup milk
1 tsp. lemon juice
3 tbsp. unsalted butter, melted
1 cup whole wheat pastry flour
1 tsp. aluminum-free baking powder
1/4 tsp. salt
1/8 tsp. nutmeg, fresh
1/4 cup sugar
2 tbsp. honey
1 large egg
1 tbs. vanilla extract
Topping
5 tbsp. unsalted butter, melted
1/4 c. pure cane sugar
1 tbs. cinnamon
1/4 c. powdered sugar
1. Preheat oven to 400 degrees.
2. In a small bowl, mix together milk and lemon juice. Let sit for 5 minutes to curdle. Melt butter in a small bowl and set aside to cool.
3. Meanwhile, whisk together the flour, baking powder, sea salt, and nutmeg in a large bowl. Set aside.
Into the cooled butter, whisk in sugar, honey, egg, and vanilla until combined. Add in milk/lemon juice combo.
4. Whisk together wet and dry ingredients until just combined. Over-mixing will create a dense doughnut.
Spray mini muffin tin pan. Evenly distribute batter. (This makes 20 doughnuts.)
5. Bake for 9 minutes. Allow to cool at least 1 minute before removing from tin and placing on a cooling rack to cool completely.
6. Meanwhile, make topping. Melt butter. In a small bowl, mix together cinnamon and sugar. In a separate bowl, add in powdered sugar.
7. Dip each doughnut hole in butter before either coating in the cinnamon/sugar mixture or powdered sugar mixture (10 of each). Place back on cooling rack until dried.
Saturday, July 6, 2013
Raspberry Almond Coffee Cake
This one is for my mom who loves raspberries more than anyone else I've ever met! I found this recipe in a magazine a while back, took a picture of the recipe in my phone and waited until I could get fresh raspberries from the farmer's market to make this. Today, I bought a 1/2 flat of mixed raspberries and blueberries, pulled out this recipe, made a few small changes and cooked this baby up. It's lovely. Tart because of the berries, a little sweet because of the sugar, crunchy due to the almonds and barely dense because of the whole wheat pastry flour. All in all, a nice, tasty treat. And if you make 8 slices, each slice comes in right around 230 calories a piece! Not bad for dessert, though this would be a nice breakfast as well.
If you're not a raspberry fan, you could easily substitute blueberries, blackberries, huckleberries or strawberries into this recipe. You could also change the nuts for something different, but be sure to chop them up smaller so they don't weigh the cake down. I'm including the recipe for icing, but I totally forgot about the icing until I was writing this recipe down! Oops! It really doesn't need it, but feel free to add it if you want.
Raspberry Almond Coffee Cake
Ingredients:
CAKE:
1 cup fresh raspberries
3 tbs brown sugar
1 cup whole wheat pastry flour
1/3 cup sugar
1/2 tsp baking powder
1/4 tsp baking soda
1/8 tsp salt
1 egg
1/2 cup sour cream
3 tbs butter, melted
1 tsp vanilla extract
1/4 cup sliced almonds
ICING:
1/4 cup powdered sugar
1.5 tsp milk
1/4 tsp vanilla extract
1. Preheat the oven to 350 degrees.
2. In a bowl, combine the raspberries and the 3 tbs brown sugar. Stir to combine.
3. In a large bowl, combine the dry ingredients of the cake, including the sugar. In a smaller bowl, combine the egg, sour cream, butter and vanilla. Mix well. Mix the wet ingredients into the dry ingredients. Stir until combined.
4. Spoon half the batter into a greased 8"round baking pan. Top with raspberry mixture. Spoon remaining batter over the top; sprinkle with almonds. Bake for 25-30 minutes or until a toothpick inserted in the center comes out clean. Cool for 10 minutes before removing from pan (I used a springform pan) to a wire rack.
5. In a small bowl, combine the icing ingredients; drizzle over coffee cake. Serve warm.
If you're not a raspberry fan, you could easily substitute blueberries, blackberries, huckleberries or strawberries into this recipe. You could also change the nuts for something different, but be sure to chop them up smaller so they don't weigh the cake down. I'm including the recipe for icing, but I totally forgot about the icing until I was writing this recipe down! Oops! It really doesn't need it, but feel free to add it if you want.
Raspberry Almond Coffee Cake
Ingredients:
CAKE:
1 cup fresh raspberries
3 tbs brown sugar
1 cup whole wheat pastry flour
1/3 cup sugar
1/2 tsp baking powder
1/4 tsp baking soda
1/8 tsp salt
1 egg
1/2 cup sour cream
3 tbs butter, melted
1 tsp vanilla extract
1/4 cup sliced almonds
ICING:
1/4 cup powdered sugar
1.5 tsp milk
1/4 tsp vanilla extract
1. Preheat the oven to 350 degrees.
2. In a bowl, combine the raspberries and the 3 tbs brown sugar. Stir to combine.
3. In a large bowl, combine the dry ingredients of the cake, including the sugar. In a smaller bowl, combine the egg, sour cream, butter and vanilla. Mix well. Mix the wet ingredients into the dry ingredients. Stir until combined.
4. Spoon half the batter into a greased 8"round baking pan. Top with raspberry mixture. Spoon remaining batter over the top; sprinkle with almonds. Bake for 25-30 minutes or until a toothpick inserted in the center comes out clean. Cool for 10 minutes before removing from pan (I used a springform pan) to a wire rack.
5. In a small bowl, combine the icing ingredients; drizzle over coffee cake. Serve warm.
Monday, April 29, 2013
Cheddar Batter Bread
To go with my delicious farm apple butter, I made Art Smith's Cheddar Batter Bread. This bread is wonderful in that it is a yeast bread, which means it has all the delicious smells and taste associated with those beautiful bubble-making creatures, but it's a quick rise bread, meaning it only goes through one 45-minute rise before it's ready to cook. I've used this bread with the apple butter, but also as a side for my meatball soup, to make a quick sandwich, for cheesy croutons, or just as a quick snack. This is a versatile bread and can be changed quickly by using Swiss instead of cheddar! Think homemade bread is out of your reach? Try this bread out - you'll love it!
Cheddar Batter Bread
Ingredients:
4 tbs unsalted butter
3/4 cup buttermilk
3/4 cup water
One 1/4-ounce pkg active dry yeast
3 large eggs
1 tsp hot red pepper sauce
4 cups AP flour
2 tbs sugar
1 tbs baking powder
1 tsp baking soda
1 tsp salt
1/4 cup freshly grated Parmesan cheese
1 cup shredded sharp Cheddar cheese
1 large egg yolk beaten with 1 tbs water, for glaze
1. Heat the butter in a medium saucepan over medium heat. Add the buttermilk and water and heat just until warm to the touch (105 to 115° F). Pour into a large bowl. Sprinkle the yeast on top and let stand for 5 minutes. Whisk to dissolve the yeast. Whisk in the eggs and hot sauce.
2. Sift together flour, sugar, baking powder, baking soda, and salt. Gradually stir into the liquid to make a thick batter. Stir in the Parmesan cheese and 3/4 cup of the Cheddar (or Swiss) cheese.
3. Lightly butter two 8 1/2 x 4 1/2 x 2 1/2-inch loaf pans. Spread the batter evenly in the pans. Cover loosely with plastic wrap and let stand in a warm place until doubled in volume, about 45 minutes.
4. Position a rack in the center of the oven and preheat to 375° F.
5. Brush the tops of the loaves with the egg mixture. Bake 25 minutes. Sprinkle the tops of the loaves with the remaining 1/4 cup of shredded Cheddar and bake until the loaves are golden and sound hollow when removed from the pans and tapped on the bottoms, 10 to 15 minutes.
6. Cool in pans for 10 minutes. Turn out onto wire racks and cool completely. (The breads can be made 2 days ahead, wrapped in aluminum foil, and stored at room temperature.)
Saturday, March 23, 2013
Banana Crunch Muffins
I gave running on the treadmill at the Y another shot the other day. They have these new machines that have a TV built right into the treadmill. You just plug in your headphones, change the channel until you find one you like and run while you're watching. Andy seems to be able to manage 10 miles or so while watching, but I still struggled to do more than 2.5 miles on the treadmill - primarily because of the commercials...hate commercials - and ultimately had to hop off and run the rest of my run on the track. However, while I was on the treadmill, I caught an episode of the Barefoot Contessa making some fabulous muffins that looked heavenly, and really heavy, but I thought, I bet I can lighten these up a bit, while still keeping some good flavor. These are still not super healthy for you, but they are substantially improved and quite tasty if I do say so myself!
So, something came out of that dreadful treadmill session...thanks Ina Garten.
*For Ina's original recipe, click HERE.
Banana Crunch Muffins (makes 24 muffins)
Ingredients:
3 cups whole wheat pastry flour flour
1.5 cups sugar (next time, I'll knock this down to just a cup)
2 teaspoons baking powder
1 teaspoon baking soda
1/2 teaspoon salt
1/2 pound unsalted butter, melted and cooled (that's 2 sticks)
2 extra-large eggs
3/4 cup non-fat milk
2 teaspoons pure vanilla extract
1 cup mashed ripe bananas (2 bananas)
1 cup medium-diced ripe bananas (1 banana)
1 cup granola (I used a mix of Uncle Sam cereal and TJ's Vanilla Almond Crunch Granola)
1 cup unsweetened shredded coconut
1. Preheat the oven to 350 degrees F.
2. Line 24 large muffin cups with paper liners. Put the flour, sugar, baking powder, baking soda, and salt into the bowl of an electric mixer. Add the melted butter and blend. Combine the eggs, milk, vanilla, and mashed bananas, and add them to the flour-and-butter mixture. Scrape the bowl and blend well. Don't overmix.
3. Add the granola and coconut into the batter and fold gently. Spoon the batter into the paper liners, filling each 1 to the top. Bake for 25 to 30 minutes, or until the tops are brown and a toothpick comes out clean. Cool slightly, remove from the pan, and serve with butter!
Tuesday, March 5, 2013
Orange Cranberry Wheat Germ Muffins
I'm always looking for a tasty breakfast that doubles as a snack and these little muffins hit the mark every time. I had a stock pile of blood oranges, so I used their wonderful juice and zest in these muffins, but regular orange juice would work just fine. These muffins are best when served warm, so if you're not eating them right out of the oven, pop them in the microwave for just a few seconds. I spread a little bit of honey butter in the middle, pair it with a fruit salad or a one-egg omelet, and I have a perfect, filling breakfast that takes me all the way to lunch time. This recipe is from my Cooking Light cookbook. I subbed out the AP flour for whole wheat pastry flour - worked like a charm.
Orange Cranberry Wheat Germ Muffins
Ingredients:
1 1/2 cups all-purpose flour (about 6 3/4 ounces)
1/2 cup raw wheat germ
1/2 cup sweetened dried cranberries
1 teaspoon baking powder
1/2 teaspoon baking soda
1/2 teaspoon ground cinnamon
1/4 teaspoon salt
1/8 teaspoon ground nutmeg
3/4 cup packed brown sugar
1/4 cup canola oil
1 teaspoon grated orange rind
1/2 cup fresh orange juice
2 large eggs
1. Preheat oven to 375 degrees.
2. Lightly spoon flour into dry measuring cups; level with a knife. Combine flour and next 7 ingredients (through nutmeg) in a large bowl; stir with a whisk. Make a well in center of mixture.
3. Combine brown sugar, oil, rind, juice, and eggs; stir with a whisk. Add egg mixture to flour mixture; stir just until combined. Spoon batter into 12 greased muffin cups. Bake for 17 minutes or until muffins spring back when touched in center.
Subscribe to:
Posts (Atom)