Showing posts with label Canning. Show all posts
Sunday, July 28, 2013
Quick Apricot Jam via the Sprouted Kitchen
As you have probably guessed by now, I love jams, and I love making jams. Apricot jam is one of my most favorite jams to make. My primary complaint with most jams is the sheer amount of sugar called for in these recipes. So, I've recently made a lot of jams with honey (yum), and have tried making jams with less sugar. Recently, I made a blackberry, boysenberry and marionberry jam with honey...delicious. But the lovely Sara from the Sprouted Kitchen included a recipe for a Quick Apricot Jam in her cookbook. The color of her jam alone was enough to make me want to try her jam.
The recipe I've used previously, which is delicious, calls for a ton of sugar, and then jam ends up coming out a pale shade of orange. Sara's jam is bright, bright peachy-orange and is spreadable and looks amazing. So, I gave it a shot. It's so easy, and it's like eating a ripe, warm apricot right off a tree in the middle of summer. While my old jam tasted more like sugar, this jam tastes just like apricots. It's a real delight, and it will be the only apricot jam I make in the future...and get this...for 1.5 lbs of apricots, I only use 1/3 cup natural cane sugar!! Because my apricots are ripe and beautiful!
Quick Apricot Jam (RECIPE FROM THE SPROUTED KITCHEN COOKBOOK)
Ingredients:
Makes about 2 cups
1 1/2 pounds ripe apricots
2 tablespoons freshly squeezed orange juice
1/3 to 2/3 cup natural cane sugar
pinch sea salt
Cut the apricots in half (or in quarters if they’re on the larger side) and discard the pits. You can leave the skin on; it will break down when the apricots are cooked.
1. In a large, heavy pot over medium-high heat, combine the apricots, orange juice and 1/3 cup sugar and stir. Once the mixture is warmed through and the juices start to release, add the salt and turn the heat up to medium-high.
2. Continue to cook, stirring frequently with a wooden spoon, until the fruit breaks down and resembles a puree, about 15 minutes. Taste for sweetness and add more sugar, if necessary. When the jam reads 190F to 200F on a candy thermometer, remove the jam from the heat and transfer to a bowl to stop the cooking process.
3. Give it a few more stirs to release the steam and allow it to cool completely. Use at once of transfer the jam to a clean glass jar and keep it in the fridge for up to 2 weeks.
Wednesday, March 6, 2013
Blueberry Jam made with Honey
I've been wanting to try making jam with honey rather than sugar, and I finally got my chance a couple weeks ago. The overall process is largely the same as traditional jam making, but you use honey (much less) rather than sugar. I also used shredded apple (for the pectin) in this blueberry jam, in order to not have to add pectin to the recipe. This was based on a recipe from the 100 Days of Real Food blog - I followed her method exactly, except I used less honey than she called for, largely because I didn't have enough honey, but it worked out perfectly! In the future, I'll continue using the smaller amount of honey. And I gotta say, I'll probably not go back to using sugar in jam. This is glorious jam - so spreadable, so smooth, so delicious, and made with real honey! Yum!
Blueberry Jam made with Honey
Ingredients:
6 pounds blueberries
3.75 cups honey (I used only 2.75 cups of honey)
1.5 unpeeled apples, grated
1.5 tablespoons lemon juice
1. Rinse the berries and remove any spoiled or severely blemished ones.
2. Add the berries, honey, grated apple, and lemon juice to a large pot over high heat. Once the mixture comes to a boil, lower the heat to medium and allow the mixture to continue to boil lightly for approximately 30 – 60 minutes. The berries will burst and thicken so be sure to scrape the sides of the pot and stir as you go. The longer the jam cooks the thicker the final product will be, although this recipe does not become quite as thick as typical store-bought jam. Mash the fruit with a potato masher once the fruit begins to soften. If foam forms on top of the fruit you can skim and discard if desired.
3. Can using the boiling water method for 10 minutes (which will keep for 1 year), or, if you don't want to can, you bottle these and keep in fridge for 3-4 weeks, if it lasts that long!!!!
Saturday, September 22, 2012
Peach Chutney
Still on the hunt with what to do with all those leftover peaches from the end of summer? Search no more! Make some delicious peach chutney, a wonderful topping for meat (chicken and pork especially), eggs, pancakes, or a variety of other options. I made and canned quite a few jars of this, but you can make it to keep it in the fridge. This is adapted from a recipe on epicurious.com
Peach Chutney
Ingredients:
1/2 cup cider vinegar
1/4 cup loosely packed brown sugar
1/4 cup white sugar
1 large sweet red pepper, seeded, diced 1/4 inch, about 1/2 cup
1 small white onion, peeled and diced, about 1/2 cup
1 small jalapeño pepper, seeded and diced, 2 tablespoons
1/3 cup white raisins
1 tablespoon finely chopped garlic
1 tablespoon grated ginger
1/2 teaspoon salt
1 1/2 pounds firm, fresh peaches, blanched to remove the skin, pit removed, sliced into wedges
1. Put the vinegar and both sugars into a non-reactive pot, place over medium heat and bring to a boil.
2. Add the red pepper, onion, jalapeño, raisins, garlic, ginger, salt and simmer 10 minutes. Add the peach segments and simmer an additional 5-10 minutes. If the peaches are still firm allow to cook several minutes more. If you would like the syrup thicker you may also allow to cook for a minute or two to reduce liquid.
3. Remove from the heat and allow to cool for 15 minutes in the pot. Serve at room temperature. Transfer all excess to a clean container and refrigerate, covered, for up to one week.
Wednesday, August 29, 2012
Spicy Carrots
I love spicy pickled carrots, but they are outrageously expensive at the store! So, I decided to make my own. This is from my Put Em Up canning cookbook.
Spicy Carrots
Ingredients:
4-6 garlic cloves, sliced
1-2 jalapeno peppers, sliced (with or without seeds)
1 tsp red pepper flakes (optional)
2 lbs carrots
4 cups distilled vinegar
1 cup sugar
3 tbs salt
1. Divide the garlic, sliced jalapenos, and pepper flakes, if using, among three clean, hot pint canning jars. Trim, peel and cut the carrots 1 inch shorter than the jars. Pack the carrots into the jars.
2. Bring the vinegar to a boil in a nonreactive saucepan. Add the sugar and salt and stir to dissolve. Pour the brine over the carrots, covering the veg by 1/2 inch with liquid. Leave 1/2 inch headspace between the top of the liquid and the lid.
3. Can using the boiling-water method. Release trapped air. Wipe the rims clean; center lids on the jars and screw on jar bands. Process for 15 minutes. Turn off heat, remove canner lid, and let jars rest in the water for 5 minutes. Remove jars and set aside for 24 hours. Can store in a cool, dark place for up to 1 year.
Sunday, August 26, 2012
Quick Sweet Pickles
Andy loves sweet pickles, and I had an excess of cucumbers lying around, so I threw together a quick sweet pickle the other night. I'm thinking Cuban sandwiches with these (even though they are typically made with Dill pickles - I like mine with sweet pickles)...they are sweet, but tangy and the cloves really provide a unique spice that you aren't expecting. I may have to add Cuban's to my menu for the week. This recipe is a modified version of Tyler Florence's recipe as shown on the Food Network site.
Please note: you will salt the cucumber for an hour before preparing them.
Quick Sweet Pickles
Ingredients:
6 kirby cucumbers or 2 regular cucumbers
1/4 cup kosher salt
1 cup water
1 cup rice vinegar
1/2 cup sugar
1 tablespoon coriander seed
1 tablespoon mustard seed
1 cinnamon stick
3 cloves
1 bay leaf
1. Wash and dry the cucumbers. Using a sharp knife or a mandolin, slice the cucumbers thinly and place in a colander. Sprinkle with salt and toss to coat. Place the colander over a bowl and allow it to sit, covered, for about 1 hour. Rinse off the salt and dry the cucumber slices well. Place them into a sterilized quart jar.
2. In a small saucepan add the remaining ingredients. Stir to dissolve sugar and bring to a boil. Remove from heat and allow it to cool. Pour the brine over the cucumbers in jar. Cover and refrigerate at least 4 hours, preferably overnight. Will keep, refrigerated, for about 2 weeks.
Tuesday, August 7, 2012
Freezer Jams
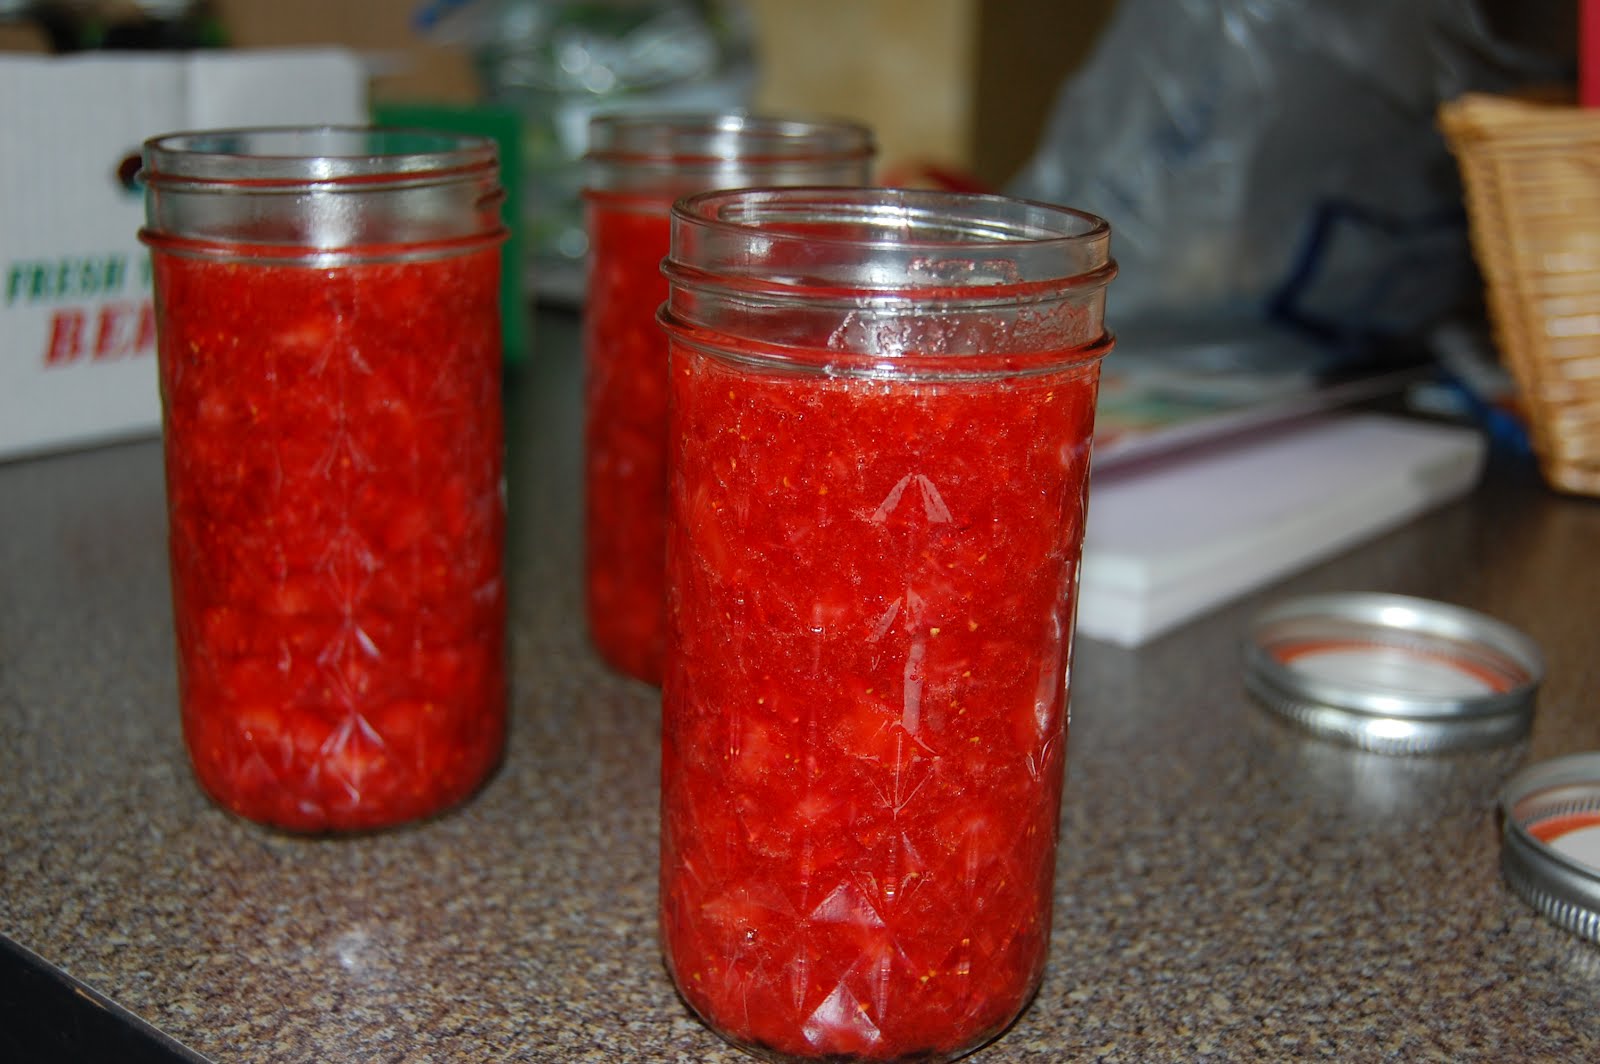
I made strawberry jam this afternoon!
The blueberries getting a good mash and then being mixed with the sugar and pectin.
My sister asked if I made freezer jams, which is another wonderful option if you're not into canning. I hadn't made any before, though I've been the beneficiary of many a wonderful freezer jam at Thanksgiving, when my husband's grandmother brings her strawberry jam to go with the rolls. Delightful!
But I specifically went out and bought a fast-acting pectin to try my hand at freezer jam (blueberry).
Ball is just one brand of pectin...there are many out there.
It was quite easy, and I'm ready to try some more this weekend with strawberries. Please note, you will not get the deep rich taste that you get from cooked jam, however, you get lovely fruity notes and if you decrease the amount of sugar to your liking, you'll end up tasting more fruit than sugar (always a bonus in my book).
So, here's how it goes.
Freezer Jam
Ingredients:
1 & 2/3 cup prepared Fruit of your choice (strawberries, blueberries, blackberries, raspberries, peaches, pears or cherries)
2/3 cup sugar (I reduced to 1/2 cup)
2 tbs Ball Real Fruit Instant Pectin
If using peaches, 1 tbs bottled lemon juice
**Note: Measure you fruit once it's been prepared (i.e., crushed or chopped), not before.
To prepare fruit:
Strawberry: Hull and crush one layer at a time using a potato masher
Peaches or pears: Peel and pit. Finely chop.
Other Berries: Crush one layer at a time using a potato masher
Cherries: Remove stems and pits. Finely chop.
1. Stir sugar and pectin in a bowl.
2. Add fruit. Stir for 3 minutes. (Set a timer - do the full three minutes.)
3. Ladle jam into clean freezer jars and let stand 30 minutes. **If you plan on freezing, rather than refrigerating and using within 3 weeks, make sure you leave at least 1/2-inch headspace, as the fruit will expand in the freezer.** Enjoy or put in your freezer.
*Will last in freezer for up to a year.
* Will last in the fridge for up to 3 weeks.
That's it! So easy!
Sunday, August 5, 2012
Green Tomato Relish
I wanted to try making my own relish because the ones from the store always seem too sweet. When I saw these green tomatoes at the fruit stand, I knew I could find a great relish recipe. And I found this one on Cooks.com. I snuck a bite as I was canning these, and it was amazingly complex and flavorful, not to mention pretty! I look forward to trying this on a hamburger in the near future.
**NOTE: I did not have 11 lbs of green tomatoes. I had just over 2 lbs., so I took this recipe and reduced it down to .20 of the called upon quantities (i.e., 11 lbs of tomatoes, to 2.2 lbs. of tomatoes, 5 apples to 1 apple, etc...)**
**This recipe requires overnight processing of the tomatoes.**
Green Tomato Relish
Ingredients:
11 lb. green tomatoes, chopped (with skins)
4 or 5 green tart apples, chopped
4 or 5 onions, peeled and chopped
1 large green pepper, seeded and chopped
3 1/2 cups cider vinegar
4 celery stalks with leaves, chopped
2 cups brown sugar
2 cups white sugar
2 tablespoons whole mixed pickling spice
1 cup water
1/2 cup canning salt
1. Wash tomatoes well. Chop the tomatoes into a large pan or bowl and sprinkle with the salt. Hang the chopped tomatoes in a cheesecloth wrap or cloth bag and allow to drain overnight. Discard juice.
2. The next day, add onions, celery, green pepper, sugars, apples, vinegar and water.
3. Stir in the whole mixed pickling spices.
4. Cook the mixture over low heat in a large pan, stirring often, until vegetables begin to stick on the bottom of the pan and the water is gone. This will take about 2 to 3 hours.
5. Have ready 7 to 9 pint size canning jars (my batch made 2 pints).
6. Ladle hot relish into clean jars leaving 1/2-inch headspace and adjust lids. Process in a boiling water bath for 10 minutes.
Blueberry Jam
Leftover blueberries hanging around? Make a yummy and quick jam. Blueberries have quite a bit of natural pectin in them, so jam comes together pretty darn quickly. And it has such a lovely color and texture. This can also be used as a syrup on pancakes, waffles or pound cake or angel food cake. The recipe is from my Put Em Up canning cookbook.
Classic Blueberry Jam
Ingredients:
4 cups blueberries
1 cup sugar
1/8 cup bottle lemon juice
1. Combine the berries with a splash of water in a medium nonreactive saucepan. Bring to a boil, stirring and crushing the berries to release their juice. Add the sugar and stir to dissolve. Stir in the lemon juice. Continue to cook at a steady boil, stirring frequently, until the jam reaches the desired gel.
2. Remove from the heat and let the jam rest for 5 minutes, stirring occasionally to release air bubbles. Skim off any foam.
3. Use the boiling-water method. Ladle into clean, hot half-pint canning jars, leaving 1/4-inch headspace. Release trapped air. Wipe the rims clean; center lids on the jars and screw on jar bands. Process for 10 minutes. Turn off heat, remove canner lid, and let jars rest in the water for 5 minutes. Remove jars and set aside for 24 hours. Check seals, then store in a cool, dark place for up to 1 year.
This made 2 1/2-pint jars.
Peach Butter
My dear friend Becca loves apple butter. She's been singing its praises to me for the last couple of years. I can't wait to make some later this week with some Ginger Apples I found at a local fruit stand. But as a precursor, I decided to make peach butter. The concept is the same, but you are just using peaches rather than apples. Fruit butters are similar to jam, however, they are typically smoother in texture (absolutely smooth usually), and are cooked down to reduce most of the water out of the fruit mixture.
Contrary to their name, there is no butter in fruit butters. Peach butter is a delightfully rich spread that can be used anyplace you use jam or any other kind of fruit butter. I bought my peaches fresh from a local fruit stand (they came from Eastern Washington where they get much more sun), waited two days for them to perfectly ripen and then made the fruit butter. This is a combo recipe between Smitten Kitchen and my Put Em Up canning cookbook.
Peach Butter
Ingredients:
3 lb. fresh peaches
1 cup water
1.75 cups sugar
1/8 cup lemon juice
1 tsp cinnamon
1/4 tsp nutmeg
1. Cut a small “x” in the bottom of each peach. Put each peach into a pot of boiling water for 30 seconds, and then into a bowl of cold water for a minute. The peels will slide right off. **I was suspicious with how well this would work, but it was so easy!!**
See the "X's" on the bottom.
Peels peeled right off!
2. Halve the peaches and remove the pits, then cut each half into chunks. Place peach chunks and water in a large pot and bring to a boil. Simmer until peaches are tender, about 15 to 20 minutes, stirring occasionally to ensure they cook evenly. Puree peaches in a food processor, blender or with an immersion blender. **I used an immersion blender, which worked very well!**
3. Put the peaches back in the pot and add the sugar and lemon juice. Bring the mixture to a good strong simmer/gentle boil, cooking them at this level for 30 to 40 minutes, stirring occasionally in the beginning and more often near the end, as it thickens up and the fruit masses risk scorching on the bottom of the pot. **I cooked for 30 minutes and it was ready.**
Done!
4. Let peach butter cool (unless you’re canning it, in which case, you would process for 10 minutes and let sit for 5 minutes in the canning bath before removing from the water). If you’re not canning it, keep it in an airtight container in the fridge. It should be good for at least two weeks.
Slightly out of focus!
Thursday, August 2, 2012
Plum Jam
We had 1.5 lbs of plums leftover from a recent purchase of plums. My family will eat plums if I make them, but none of them will actually choose a plum on their own (weird people, I know). So, my husband suggested I try my hand at plum jam. I looked around for a couple of recipes and found one that I liked. This recipe called for me keeping the skin on, actually because the skin contains quite a bit of pectin, which helps the jam set up. While the skins don't affect the taste of the jam, they are a bit of a texture issue, if you had an issue with texture (I don't, but Andy does). So, next batch of plum jam, (and there will be more - it is deliciously rich and caramel-y) I will remove the skins. How? Bring a large pot of water to a boil. Meanwhile, take a paring knife and just barely break the skin (scoring) on the bottom of each plum, and draw an X. Drop the plums in whole. Cook for 2-3 minutes. Remove them quickly to a bowl of ice water. Let them rest for a minute or two. Take the paring knife, grab the edge of the X you scored on the bottom, and peel off the plum peel. Easy.
Plum Jam adapted from Domenica Cooks blog
Ingredients:
1.5 pounds plums
1.5 cups sugar
Peel from 1 small lemon, coarsely chopped
1 tbs lemon juice
1. Cut the plums in half removing the pits. Cut each half into 4 pieces and put in a bowl with the sugar, lemon peel and juice. Mix well. Let the plums stand at room temperature for 1 to 2 hours.
2. Have ready 2 half-pint or 1 pint sterilized jars and their rings and lids.
3. Pour the plum mixture into a large, heavy-bottomed non-reactive pot. Bring to a boil over medium-high heat; reduce the heat to medium, and cook at a lively simmer for 15 to 20 minutes, until the mixture has darkened and begun to thicken, or until it reaches 220 degrees.
4. Ladle the hot jam into the sterilized jars, leaving 1/4 inch of headspace. Wipe the rims clean if necessary with a clean, damp cloth, and screw the lids on the jars. Process the jars in a boiling water bath for 10 minutes. Remove the jars and set them upright on a clean kitchen towel. Within a couple of minutes you should hear the jar lids “ping” signifying that they have sealed properly. Let the jars cool to room temperature before storing in a cool, dark place. They will keep for up to a year.
Thursday, July 26, 2012
Blackberry Vinegar
Why pay high prices for fruit vinegar when you can make your own easily? This is about the easiest recipe you can find for making your own fruit vinegar. This came from my canning cookbook Put 'Em Up. This will be wonderful for vinaigrette, marinades, or it could even be reduced down to a nice syrup for desserts. I used blackberries, but you could use any berry you like.
Blackberry Vinegar
Ingredients:
2 cups white distilled vinegar
2 cups blackberries
1. Puree the berries and vinegar in a blender. Transfer to a quart jar. Let stand 5-7 days in a cool, dark place, shaking the jar daily to blend the flavors.
2. Strain through a double thickness of cheesecloth and discard the solids. Return the strained vinegar to the jar or decant into a decorative bottle. Vinegar keeps at room temperature for up to 1 year.
Friday, July 20, 2012
Homemade Strawberry Jam
It's summer, although with the massive thunder and lightning we've had today, you'd never know it! Summer means berries. Berries mean homemade jam. Yum! We got about 4 cups of berries at the farmer's market last weekend, so I put up two 1/2 pints of jam. Not nearly enough to last more than 2 weeks, but it's a start. I tend to make the classic version, with no pectin, as I think it's a richer, more complex flavor, with hints of caramelization and rich strawberry flavor, but it does take more time than pectin jam. This recipe is from my canning cookbook, Put 'Em Up.
Classic Strawberry Jam
Ingredients:
4 cups strawberries, hulled and halved if large
1 cup sugar
1/8 cup bottle lemon juice
1. Toss the strawberries and sugar in a large bowl and macerate overnight to coax out the fruit's juice.
2. Transfer the mixture to a large nonreactive saucepan. Bring to a boil, stirring and crushing to release the juice. Stir in the lemon juice. Continue to cook, stirring frequently, until the jam reaches the desired gel, about 20 minutes. Remove from the heat and let the jam rest for 5 minutes, stirring occasionally to release air bubbles. Skim off any foam.
3. Use the boiling-water method. Ladle into clean, hot half-pint canning jars, leaving 1/4-inch headspace. Release trapped air. Wipe the rims clean; center lids on the jars and screw on jar bands. Process for 10 minutes. Turn off heat, remove canner lid, and let jars rest in the water for 5 minutes. Remove jars and set aside for 24 hours. Check seals, then store in a cool, dark place for up to 1 year.
**A note about the gel stage from Sherri Brooks Vinton:
Jams reach the gel stage at 220 degrees F. If you have a candy thermometer, you can use this to see if your jam gets to 220 degrees.
OR
When you begin the jam process, put a small plate in the freezer. When you think the jam is nearly ready, drip a few drops onto the cold plate and let cool, then push the smudge with your finger. If it wrinkles when you push it, your jam is ready. If you push it with your finger and it looks like you're parting a mini Red Sea but there are no wrinkles, cook a few minutes longer and try again.
Monday, July 16, 2012
Refrigerator Pickles
**Update: These turned out so delectable! I brought them to a getaway with friends and they were a big hit! I made another 2 quart jars and a pint tonight to add to my quickly diminishing supply!**
I love pickled vegetables, and since last summer, I've begun trying to pickle them at the peak of their season so I can enjoy these vegetables in a different way than just roasted, raw or sauteed. If you haven't tried pickled vegetables (other than pickles), I highly suggest you give them a try. I took the bounty from my farmer's market finds and pickled away this weekend using Ted Allen's pickling recipe from the Food Network. Easy peasy and super yummy.
Refrigerator Pickles
Ingredients:
For the brine:
10 cloves garlic, peeled
2 cups white vinegar
6 tsp kosher salt
Several sprigs of fresh dill
1 tsp celery seed
1 tsp coriander seed
1 tsp mustard seed
1/2 tsp black peppercorns
1/2 tsp pink peppercorns (if you have them)
For the vegetables:
Whatever you have that can be pickled (pretty much anything)
6 Kirby cucumbers, quartered lengthwise
6 young spring carrots, peeled and cut in half lengthwise
1 handful large scallion pieces or green beans
A few pieces of cauliflower to tuck in wherever they'll fit
4 small hot red chiles or 2 jalapenos
**I used a large cucumber, cut into thicker round slices, 1 medium summer squash, cut into half moons, 6 spring carrots, peeled and cut in half lengthwise and quite a bit of cauliflower. Experiment here - there are so many wonderful options. Green beans are one of my favorites - see my Szechuan Beans and Dilly Beans.**
1. In a medium saucepan, bring 4 cups water to a boil, reduce the heat so the water simmers and add the garlic. Cook for 5 minutes. Add the vinegar and salt, raise the heat and bring to a boil, stirring until the salt dissolves. Remove from the heat.
2. In 2 clear 1-quart jars, place a few sprigs of dill. Divide the seeds and peppercorns between the jars. Using tongs, remove the garlic from the brine and place 5 cloves in each jar. Then pack the jars full of cucumber, carrots, scallions or green beans, cauliflower and chiles. You want them to be tightly stuffed.
3. Bring the brine back to a boil and pour over the veg to cover completely, let cool, then cover and refrigerate. The pickles will taste good in just a few hours, better after a couple of days. And they'll keep for about 3 months.
**I had a little leftover veg and brine, so I made 2 quarts and 1 pint.
Monday, April 23, 2012
Tomato Jam
Have you heard about tomato jam? I've seen it, especially in the summer time, in just about every cooking magazine known to man, and I've seen about a dozen recipes calling for everything from bacon to ginger. Tomato jam is a surprisingly sweet, yet savory concoction that can be used in place of ketchup, or paired with cheeses or eggs. Its uses are only as narrow or as wide as your imagination. I've always wanted to try my hand at it, so tonight, I found a simple recipe and gave it a go.
BEWARE: Your house will smell ABSOLUTELY scrumptious when you make this tomato jam. My kids kept coming around, sniffing at the pot, asking me over and over (even though I told them from the get-go) what it was I was making. The cloves, cinnamon and ginger are decadently over the top.
Tomato Jam (as seen on The Wednesday Chef blog)
Ingredients:
1.5 pounds ripe plum tomatoes, cored and coarsely chopped
1 cup sugar
2 tablespoons freshly squeezed lime juice
1 tablespoon fresh grated or minced ginger
1 teaspoon ground cumin
1/4 teaspoon ground cinnamon
1/8 teaspoon ground cloves
1 teaspoon salt
1/8 to 1/4 teaspoon red pepper flakes or cayenne
1. Combine all ingredients in a heavy medium saucepan, Bring to a boil over medium heat, stirring often.
2. Reduce heat and simmer, stirring occasionally until mixture has consistency of thick jam, about 1 hour 15 minutes.
**Mine took a bit less time then this...go by sight, not the timer.** Taste and adjust seasoning, then pour into hot, sterilized jam jars, screw the lids on and turn the jars upside down to cool completely.
Saturday, August 27, 2011
Apricot Jam
We got apricots in our weekly CSA box this week. While I love the flavor of apricots, I can't bring myself to just eat them plain as a fruit. I know, what's wrong with me? But, I do LOVE apricot jam (who doesn't?), and I have numerous recipes that call for it, not to mention just eating it alone on some warm bread conjures up all sorts of good feelings for me.
I searched around for a good apricot jam recipe and landed (once again) on David Lebovitz' blog. I told you about him in a previous post - his site is gorgeous and he always has something amazing cooking. His recipe for apricot jam struck a chord with me, so I tried it. *I didn't use Kirsch, as he does, but instead put in a tsp of almond extract (yum).
Rather than detail what I did, I'll leave it to the professionals and give you the link to his blog, pictures and all. Check it out and put some apricot jam (or preserves) up soon. DELIGHTFUL.
http://www.davidlebovitz.com/2009/08/apricot-jam/
Thursday, July 21, 2011
Fig Jam and Dilly Beans
2 lb carton of figs - YUM!!
Figs being stemmed, quartered and prepared for slaughter - er, I mean JAM!!
Dilly, dilly, dilly beans...go ahead and say it...it's fun!
Oh ya, more canning fun!!
Tonight I made Fig Jam - that gloriously sweet, sticky figgy goodness!
And...
Dilly Beans - filled with dill weed, dill seed, garlic, peppercorns and green beans!
HEAVEN!!
Dilly Beans
Ingredients:
4 lbs green beans, washed, topped and tailed
6 garlic cloves, peeled and sliced
1 cup fresh dill weed
2 tbs dill seed
1 tbs black peppercorns
4 cups distilled white vinegar
2 cups water
1/4 cup sugar
2 tbs salt
1. Cute beans into lengths 1 inch shorter than the pint jars (about 8). Pack the beans vertically in eight clean, hot jars, somewhat tightly. Divide the garlic, dill weed, dill seed, and peppercorns among the jars.
2. Combine the vinegar, water, sugar and salt in a medium nonreactive saucepan, and bring to a boil. Pour the hot brine over the beans to cover by 1/2 inch. Leave 1/2 inch of headspace between the top of the liquid and the lid.
3. Can using the boiling-water method. Release trapped air. Wipe the rims clean; center lids on the jars and screw on jar bands. Process for 15 minutes. Turn off heat, remove canner lid, and let jars rest for 5 minutes in the water. Remove jars and set aside for 24 hours. Can be stored in a cool, dark place for 1 hour.
Monday, July 18, 2011
Szechuan Beans
On my Saturday morning trip to the farmer's market, Micah and I found some GORGEOUS green beans. I bought a pound, along with some Italian garlic, and headed home to put up some spicy Szechuan Beans. These are basically pickled and are delicious over rice with a little bit of their pickling liquid, or even on their own as a side dish to your meal. This recipe is from Put 'em Up, by Sherri Brooks Vinton.
Szechuan Beans
Ingredients:
1 lb green beans, washed, topped and tailed
1 cup cider vinegar
1/2 cup water
1/4 cup soy sauce
1/4 cup sugar
2 tbs dark sesame oil
1 tbs whole peppercorns
1 (1 inch) knob ginger, sliced into coins
2 garlic cloves, sliced
1. Line several baking sheets with dish towels and set aside. Prepare an ice-water bath in a large bowl or clean sink.
2. Bring a large pot of water to a boil. Drop the beans into the water, no more than 1 lb. at a time, and return to a boil. Blanch for 1 minute.
3. Scoop out the beans with a spider or slotted spoon and plunge them into the ice-water bath. Remove the beans from the ice bath and spread on the towel-covered baking sheets. Blot dry.
4. To make pickles, pack the beans vertically into a quart jar.
5. Combine the vinegar, water, soy sauce, sugar, sesame oil, peppercorns, ginger, and garlic in a medium nonreactive saucepan. Bring to a boil and simmer for 1 minute. Pour the hot brine over the beans to cover by 1/2 inch. Leave 1/2 inch of headspace between the top of the liquid and the lid.
6. Refrigerate: Cool, cover, and store in the refrigerator for up to 1 month.
**My liquid didn't quite cover the beans - in hindsight, I should have cut them shorter, but for this batch, every morning I go into the fridge and shake the jar back and forth to make sure everyone gets a nice pickled bath.
Drunken Cherries
Isn't that a wonderful title? Drunken cherries - yum. I have officially purchased my canning set for the summer and have begun trying all sorts of recipes from the cookbook I purchased earlier in the year Put 'em Up by Sherri Brooks Vinton.
One of the first recipes that caught my eye was this one for Drunken Cherries. Vinton says these delightful things can be used as a topping for ice cream or in various cocktails. They'd also be great over brownies, cake, custard, mousse or a million other things! They were super easy to make and fortunately, I'd received 1 lb. of gorgeous organic Bing Cherries in my CSA box the week before.
Drunken Cherries
Ingredients:
1 lb sweet cherries, such as Bing, stemmed but not pitted
1.5 cups bourbon (brandy, Cognac or other like liquor could be used instead)
1/2 cup brown sugar
1/2 cup water
1. Cut a slit in each cherry with a small paring knife to allow the flavors to soak through. Combine the cherries and the liquor in a quart jar. (I used Cognac as we were out of bourbon.)
2. Bring the sugar and water to a boil in a medium saucepan, stirring to dissolve the sugar. Pour the syrup into the cherry-filled jar. Cover and shake. Let rest for at least 1 week. Keeps at room temperature for up to 1 year.
Sunday, November 14, 2010
Pickled Carrots
As I've mentioned before, I love pickled carrots, but I've never made them before. I passed a tiny jar in Safeway the other day and was appalled to see them marked for $8.99! Surely I could make them for much cheaper. I found a recipe in Rachael Ray's magazine, "Everyday with Rachael Ray," and thought I'd give it a shot. This is actually Michael Schlow's recipe, though I made a few small changes. His original recipe is to quick-pickle but I am using this for a longer-term pickling, so I'm jarring mine.
"Magic" Pickled Carrots
(I halved the recipe and this is the halved recipe below.)
Ingredients:
1 cup white wine vinegar
1/2 cup + 1/8 cup sugar
1 tbs salt (I used pickling salt)
3/4 tbs coriander seeds
3/4 tbs mustard seeds
1/2 tbs whole black peppercorns
4 whole cloves
1 bay leaf
1/2 tbs crushed red pepper flakes
5 large carrots, sliced into sticks
1. In a large, non-reactive saucepan, bring 1 cup water, the vinegar, sugar, salt, coriander seeds, mustard seeds, peppercorns, cloves and bay leaf to a simmer over medium heat, stirring to dissolve the sugar. Cook for 5 minutes. Add the crushed red pepper and let steep for 5 minutes.
2. Place the carrots in a large stainless steel or glass bowl. (I jarred mine.) Add the hot pickling liquid, weighing the carrots down with a plate if necessary to submerge. Let sit until the mixture comes to room temperature. Serve the carrots with some of the liquid.
In a couple of days, I'm going to try these babies out. Spicy, a little sweet, soft, but still crunchy - they are the perfect snack!!
Thursday, November 4, 2010
Canning Tomatoes
Our friend Dave won a tomato plant earlier this summer. Funny thing is, he doesn't like tomatoes, so I volunteered to take any he might grow, since I didn't grow my own this year. Due to our unusually cool summer, most of the tomatoes in the area didn't redden up very well, so by the time our first frost appeared, Dave pulled about 2 dozen green tomatoes off his plant, packed them up in a brown paper bag for me and dropped them off. I rolled the bag down, put it in a dark corner of my pantry and forced them to ripen up over the last three weeks. Today, I pulled them out and minus 4-5 tomatoes that had spoiled, every other tomato turned red and was ready for action.
I'd never be able to use all those tomatoes right away and I've been dying to try my hand at canning. I've found a new show on the Cooking Channel (not Food Network, but its sister channel, the Cooking Channel) called French Cooking at Home with Laura Calder. It's a culinary delight! I've found sooooo many fabulous recipes to try, but recently she showed us how to can tomatoes with a very easy recipe and I've been longing to try it out. Today I had my chance.
Anne Willan's Home Canned Tomatoes
Recipe courtesy Laura Calder
Ingredients:
Tomatoes
Few sprigs fresh thyme (I used rosemary)
Bay leaves
1 or 2 onion slices
Water, as needed
Quart jars
1. Pack whole tomatoes into quart/litre jars with a few thyme sprigs, a couple of bay leaves, and an onion slice or two.
2. Close the lids and set the jars on a rack in a deep pan.
3. Add enough water to cover generously.
4. Weight down with a brick so they don't float.
5. Simmer for an hour and a half, until they lose their shape and collapse.
6. Let the jars cool in the water so that they form a tight seal.
7. When done, each jar will look only half full of tomatoes.
I filled the jars as full as they would allow and sure enough, once they cooked down, each jar only looked half full...half full of delicious goodness! I didn't have a brick, so I weighed my jars down with some stainless steel bowls. These tomatoes can be used in any recipe canned tomatoes would be used in and can make a lusciously smooth tomato soup. Can't wait to pull these out in a couple months when there's not a decent tomato around!!
Subscribe to:
Posts (Atom)